Pineapple Coconut God Bless America Cake
Description
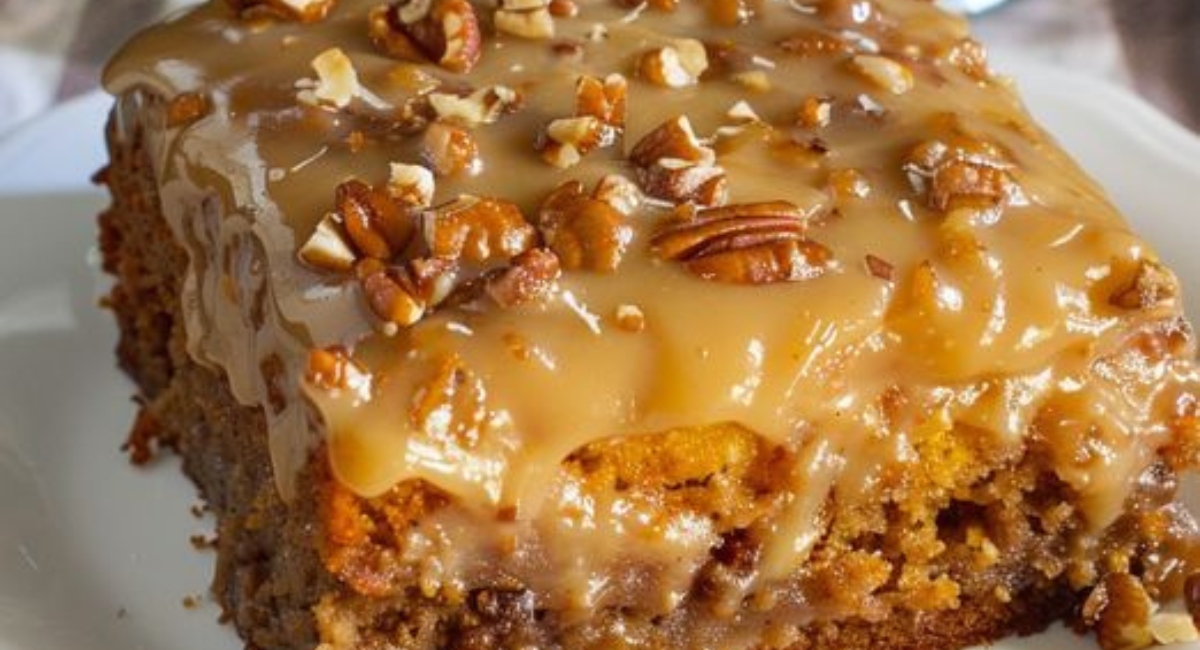
Picture a radiant slice of sunshine on your plate—a delightful slice of Pineapple Coconut God Bless America Cake that marvelously blends tropical flavors with comforting home-baked goodness. This cake is not just a dessert; it's a celebration of simple pleasures and a tribute to the classic American cake recipes that have graced family tables for generations. With its moist texture, rich layers of coconut and pecans, and a dramatic icing that oozes sweetness, this cake promises a heavenly experience with every bite.
Originating from traditional Southern-style desserts, the Pineapple Coconut God Bless America Cake invites you to join in the joy of home cooking, where flavors embrace nostalgic memories of family gatherings and summertime picnics. Whether you're baking for a festive occasion or merely attempting to sweeten up an ordinary day, this cake brings warmth and joy into any occasion. Easy to prepare, with straightforward steps that won’t overwhelm even novice bakers, it’s a dish that transcends generations, promising to become a cherished favorite in your recipe repertoire.
The combination of crushed pineapple and coconut brings an inviting tropical mix that harmonizes beautifully with the nutty crunch of pecans. Every aspect of this cake is designed to tantalize your taste buds, from the rich frosting to the tender crumb of the cake itself. As you gather the ingredients and embark on this culinary adventure, prepare to fill your kitchen with heavenly aromas that will envelop all who enter. Ready to dive in?
Ingredients
- For the Cake:
- 1 can (20 oz.) of crushed pineapple, inclusive of juice
- 2 large eggs
- 1/4 cup of vegetable oil
- 1 cup of granulated sugar
- 1/2 cup of brown sugar, firmly packed
- 2 cups of all-purpose flour
- 2 teaspoons of baking soda
- 1/2 teaspoon of salt
- For the Icing:
- 1 can (12 oz.) of evaporated milk
- 1 cup (2 sticks) of unsalted butter
- 1 1/2 cups of granulated sugar
- 2 cups of shredded coconut
- 1 cup of pecans, coarsely chopped and toasted
- 1 teaspoon of pure vanilla extract
- 1/4 teaspoon of salt
- *Substitutions and Variations:*
- If you’re looking for alternatives, you can substitute melted coconut oil for vegetable oil, adding even more tropical flavor. For a gluten-free option, consider using a 1:1 gluten-free flour blend in place of all-purpose flour. To amp up the flavor profile, feel free to add a touch of almond extract to the frosting or incorporate chopped pineapple pieces into the cake batter for an intensified pineapple experience. Additionally, using toasted walnuts instead of pecans can impart a slightly different yet delicious flavor.
Preparation Method
1. Preheat the oven to 350°F or 175°C.
2. Grease a 9x13 inch baking dish.
3. In a large bowl, mix eggs, granulated sugar, brown sugar, vegetable oil, and crushed pineapple with juice until smooth.
4. Gently fold in flour, baking soda, and salt until just combined.
5. Pour the batter into the prepared baking dish.
6. Bake for 25 to 30 minutes, checking for doneness with a toothpick.
7. In a saucepan, combine evaporated milk, granulated sugar, and unsalted butter over medium-high heat, stirring until it boils.
8. Reduce heat to simmer for 10 minutes, stirring gently.
9. Remove from heat and stir in shredded coconut, toasted pecans, vanilla extract, and a pinch of salt.
10. Pour the icing over the warm cake and spread evenly.
11. Allow the cake to rest for a bit to set the icing before serving.
Tips and Conclusion
To enjoy this cake in a different light, consider serving it with a scoop of vanilla ice cream or a dollop of whipped cream topped with toasted coconut flakes. It also pairs remarkably well with fresh fruit salad, creating a vibrant dessert spread that's perfect for any gathering or summer BBQ. For long-term storage, you can keep the cake wrapped in plastic wrap or stored in an airtight container in the refrigerator for up to a week. This way, you can enjoy a piece of this tropical paradise whenever you please!
Baking the Pineapple Coconut God Bless America Cake is more than just following a recipe; it's about creating an experience filled with love, warmth, and delightful flavors. From the first whisk of eggs to the last drizzle of icing, every moment celebrates the joy of baking. As you slice through this beautifully iced cake, the layers reveal a moist and tender crumb, embodying the spirit of summer and nostalgia.
This cake is certain to steal the show at any gathering, inviting friends and family to reminisce about shared moments and create new memories around the table. Once you’ve savored this tasty delight, consider exploring other recipes on our site that embrace the same warm spirit of baking—from chocolatey indulgences to lighter fruit-based desserts. Share the joy of this cake with others, and encourage them to join the adventure of baking. Happy Baking!


