Peanut Butter Passion Bars
Description
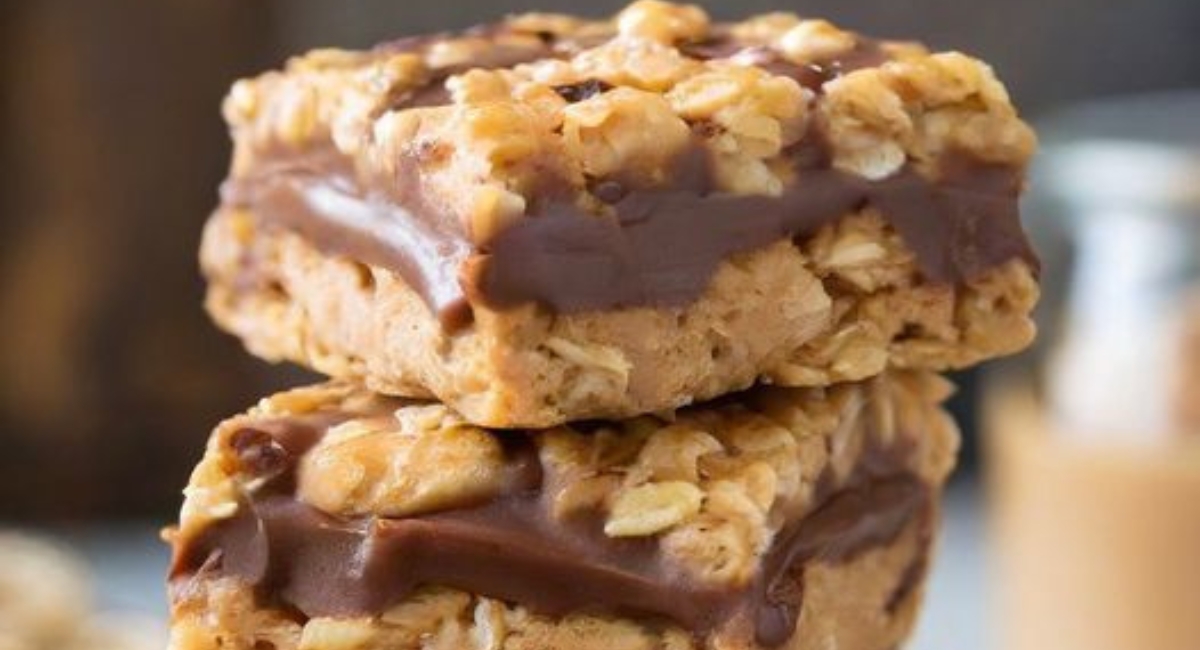
Dive into the blissful world of Peanut Butter Passion Bars, a delightful treat that perfectly merges the rich tastes of peanut butter and chocolate. The luscious layers of these bars offer a satisfying crunch from traditional rolled oats, creating a symphony of textures that will tantalize your taste buds and leave you craving more. Originating from classic American desserts, these bars have become a beloved staple in many households, easily capturing hearts at potlucks, picnics, and cozy family gatherings.
The beauty of Peanut Butter Passion Bars lies in their versatility and ease of preparation. Whether you're a baking novice or a seasoned pro, these bars promise a delightful kitchen experience. Each bite is a nostalgic nod to childhood favorites, celebrating the quintessential flavor combination of peanut butter and chocolate that we all know and adore. As you prepare this recipe, the warm, inviting scent wafts through your home, making it nearly impossible to resist sneaking a piece as soon as they come out of the oven. Gather your loved ones, because these bars are perfect for sharing—and with their tempting layers, it's guaranteed they'll disappear faster than you can make them!
Ingredients
- *For the crust and topping:*
- 3/4 cup of diced butter, at room temperature
- 1 cup of flour
- 2 cups of traditional rolled oats
- 1 cup of brown sugar
- 1/2 teaspoon of salt
- 1/2 teaspoon of baking soda
- *For the filling:*
- 3/4 cup of creamy peanut butter
- 1 can (14 oz) of sweetened condensed milk
- 2 teaspoons of vanilla extract
- 1 cup of semi-sweet chocolate chips
- Feel free to explore variations with these ingredients. You could swap the creamy peanut butter for crunchy peanut butter to add texture, or substitute almond butter for a nut-free option if needed. If you're feeling adventurous, throw in a handful of chopped nuts, like walnuts or pecans, for additional crunch.
Preparation Method
1. Preheat the oven to 350°F (175°C).
2. Grease a 9x13-inch baking pan with butter or cooking spray.
3. In a large bowl, mix flour, rolled oats, brown sugar, salt, and baking soda.
4. Blend diced room temperature butter into the dry mixture until crumbly.
5. Reserve half of the crumbly mixture for the topping and press the other half into the bottom of the baking pan.
6. In a separate bowl, mix creamy peanut butter and sweetened condensed milk until smooth, then stir in vanilla extract.
7. Spread the peanut butter mixture evenly over the crust in the baking pan.
8. Sprinkle semi-sweet chocolate chips over the peanut butter layer.
9. Crumble the reserved oat mixture over the chocolate chips.
10. Bake for 25 to 30 minutes until golden brown and bubbly around the edges.
11. Allow to cool in the pan on a wire rack before slicing into squares.
Tips and Conclusion
For a fun twist, consider adding a drizzle of melted chocolate over the cooled bars for presentation. Just melt an extra half-cup of chocolate chips in the microwave in 30-second intervals, stirring until smooth, and then drizzle it artfully over the top of the bars before cutting. This not only enhances the visual appeal but also adds an extra layer of chocolatey goodness.
As for storage, these Peanut Butter Passion Bars keep well in an airtight container at room temperature for up to five days. If you want to extend their shelf life, you can refrigerate them to keep them fresh for about a week and a half. For longer storage, they freeze beautifully. Just wrap each bar in plastic wrap, place them in a freezer-safe container, and you can enjoy them up to three months later. Always make sure to defrost them at room temperature a couple of hours before serving.
Creating Peanut Butter Passion Bars is not only a treat for the senses but also a heartfelt way to connect with family and friends. Think of all the smiles you will create as you share these sweet bars, filled with that delectable harmony of flavors everyone loves. Their combination of creamy peanut butter, rich chocolate, and crumbly oat crust creates a moment of bliss in every bite.
Now that you've mastered this delightful recipe, why not check out some other scrumptious treats on our site? From rich chocolate brownies to refreshing fruit bars, there’s something for every palate to discover. We invite you to dive deeper into our collection, share this recipe with your friends and family, or customize it further to suit your taste. Happy baking, and may your kitchen be filled with the delightful aroma of fresh treats!

