Classic Cherry Delight

Description
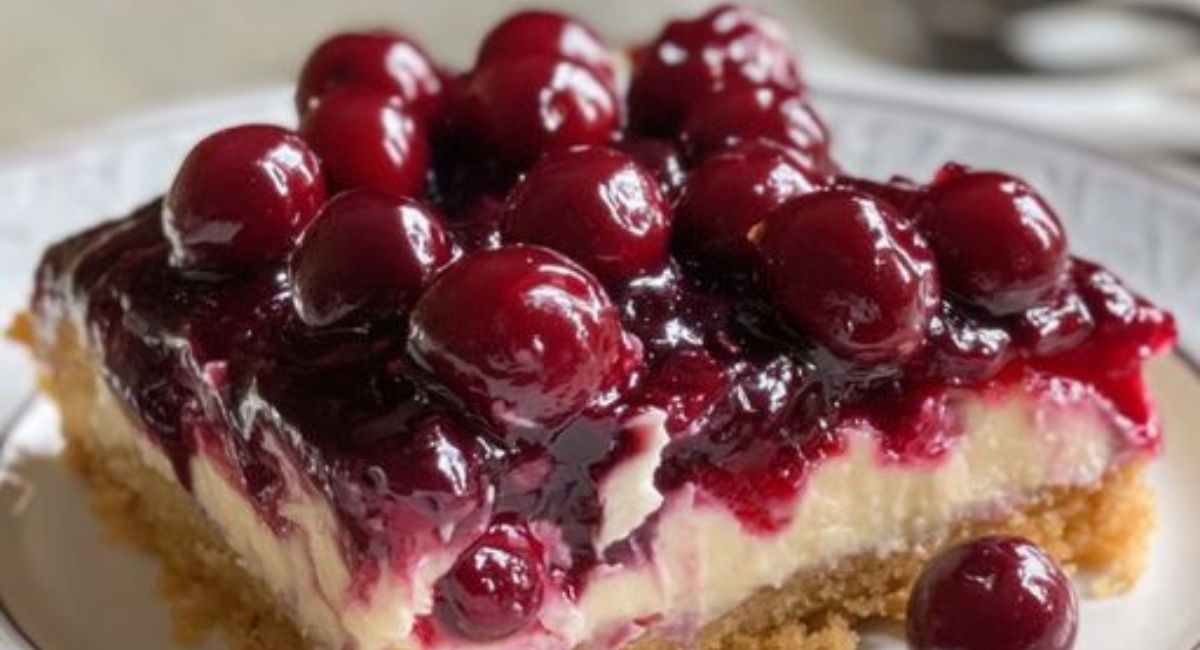
These No-Bake Cherry Cheesecake Bars are the perfect dessert for anyone who loves rich, creamy cheesecake but doesn’t want to deal with the hassle of baking. With a buttery graham cracker crust, a smooth cream cheese filling, and a sweet cherry topping, this dessert is easy to assemble and always a crowd-pleaser. Whether you're hosting a family gathering or just want a simple dessert to enjoy at home, these cheesecake bars are a must-try!
Ingredients
- For the Crust:
- 7 tablespoons unsalted butter, melted
- 1 ½ cups graham cracker crumbs (about 9 whole graham crackers)
- 3 tablespoons granulated sugar
- For the Filling:
- 8 ounces cream cheese, softened
- 1 cup powdered sugar
- 1 teaspoon pure vanilla extract
- 1 container (8 ounces) Cool Whip
- 1 can (21 ounces) cherry pie filling
Preparation Method
1. Melt the butter in a microwave-safe bowl for about 30 seconds.
2. Combine melted butter, graham cracker crumbs, and sugar until it resembles wet sand.
3. Press the mixture into the bottom of a greased 8 x 8-inch baking dish and set aside.
4. Beat softened cream cheese in a large bowl until smooth.
5. Gradually add powdered sugar and vanilla to the cream cheese, mixing until smooth.
6. Gently fold in Cool Whip until combined.
7. Spread the cream cheese filling evenly over the crust.
8. Spoon cherry pie filling over the cream cheese layer and spread gently.
9. Cover and refrigerate for at least 2 hours or overnight.
10. Slice into squares and serve, refrigerating any leftovers.
Tips and Conclusion
Bonus Tips:
Customize the Topping: While cherry pie filling is a classic choice, feel free to switch it up with blueberry, strawberry, or even peach pie filling. You can also add fresh fruit for an extra burst of flavor.
Make-Ahead Dessert: These bars are perfect for making ahead of time. Prepare them the night before and let them chill overnight for a stress-free dessert the next day.
Use Homemade Whipped Cream: If you prefer, you can swap the Cool Whip for homemade whipped cream by beating 1 cup of heavy cream with 2 tablespoons of sugar until soft peaks form.
Graham Cracker Substitutes: If you want to try something different, you can substitute graham crackers with crushed cookies like vanilla wafers or shortbread for a unique crust flavor.
Conclusion:
These No-Bake Cherry Cheesecake Bars are the ultimate quick and easy dessert for any occasion. The combination of the buttery graham cracker crust, the rich and creamy cheesecake filling, and the sweet cherry topping makes this a treat that everyone will love. Plus, with no baking required, this recipe is perfect for when you want something delicious but don't want to heat up the kitchen. Enjoy every bite of this cool and creamy dessert, and make it your go-to for effortless, impressive treats!


