Fruit Salad Cheesecake
Description
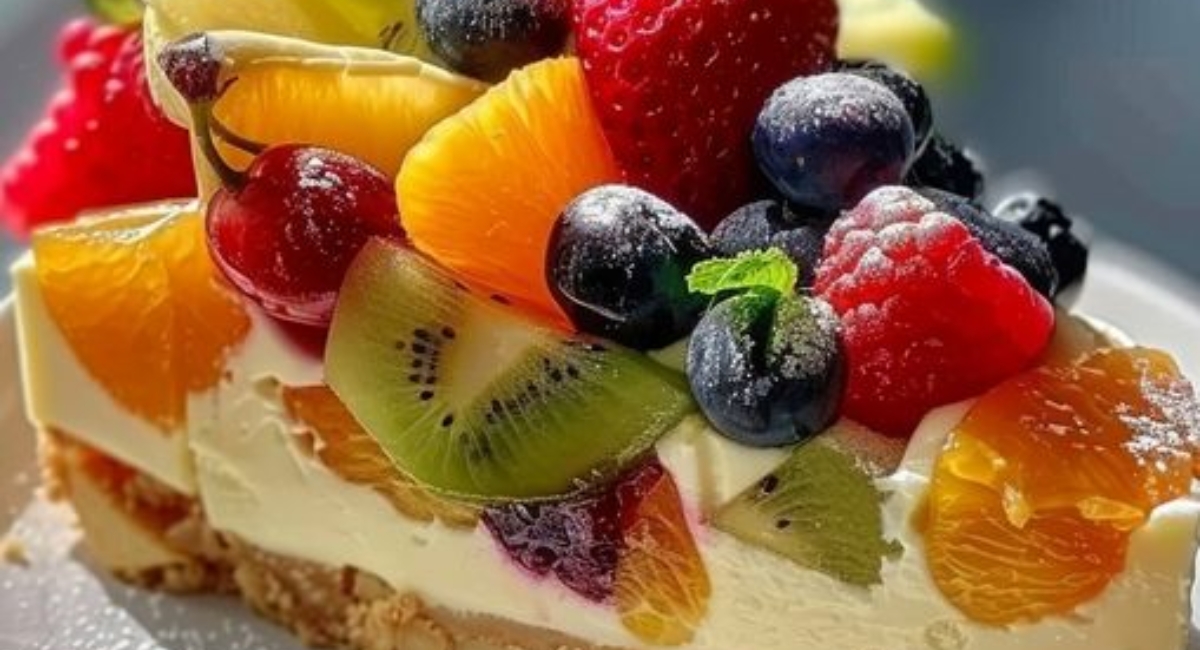
Are you ready to indulge in a dessert that combines the creaminess of cheesecake with the vibrant freshness of fruit salad? Allow me to introduce you to the delightful Fruit Salad Cheesecake—a sweet treat that captures the essence of warm summer days and festive gatherings. With a luscious cheesecake filling resting upon a buttery graham cracker crust and adorned with a bounty of seasonal fruits, this dessert is not only visually stunning but a joy to eat.
Originating from the classic creamy cheesecake, this fruit-laden twist offers a refreshing alternative, striking a perfect balance between richness and brightness. Each slice offers a mouthful of velvety cream cheese intermingled with the juicy sweetness of fresh fruits like strawberries, peaches, kiwi, and mango, making it a wholesome and uplifting choice for any occasion. Whether you’re hosting a summer barbecue, celebrating a birthday, or simply seeking a delightful way to close your meal, this cheesecake will surely impress your guests.
And the best part? It’s surprisingly easy to prepare! Even novice chefs will find comfort in crafting this beautiful dessert. With just a few simple steps, you can create a stunning centerpiece that everyone will rave about. Now, roll up your sleeves, and let’s dive into the recipe!
Ingredients
- For the Crust:
- 1 1/2 cups graham cracker crumbs
- 1/4 cup granulated sugar
- 1/2 cup unsalted butter, melted
- For the Cheesecake Filling:
- 16 oz cream cheese, softened
- 1 cup granulated sugar
- 1 teaspoon vanilla extract
- 3 large eggs
- 1 cup sour cream
- 1 cup heavy cream
- For the Fruit Topping:
- 1 cup diced fresh strawberries
- 1 cup diced fresh peaches or nectarines
- 1 cup diced fresh kiwi
- 1 cup diced fresh mango
- 1/4 cup honey or maple syrup
- Fresh mint leaves for garnish (optional)
- Substitutions and Variations:
- For a gluten-free version, you can use gluten-free graham crackers or almond flour to make your crust. If you're looking to reduce sugars, consider using natural sweeteners like agave syrup instead of honey. Mix up the fruits according to what is in season or your personal preferences—raspberries, blueberries, and bananas work beautifully as well!
Preparation Method
1. Preheat the oven to 325°F (163°C).
2. In a medium bowl, mix graham cracker crumbs and granulated sugar, then add melted butter and combine until it resembles wet sand.
3. Press the crumb mixture into the bottom of a 9-inch springform pan and bake for 8-10 minutes until set and slightly golden. Let cool.
4. In a large bowl, beat softened cream cheese until smooth, then add granulated sugar and vanilla extract, mixing until combined.
5. Add eggs one at a time, mixing well after each addition. Fold in sour cream and heavy cream until blended.
6. Pour the filling over the cooled crust and spread evenly.
7. Bake for 50-60 minutes until the edges are firm and the center has a slight jiggle.
8. Turn off the oven and crack the door, letting the cheesecake cool in the oven for about an hour.
9. Remove from the oven, cool to room temperature, cover, and refrigerate for at least 4 hours or overnight.
10. In a bowl, combine diced strawberries, peaches, kiwi, and mango. Drizzle with honey or maple syrup and toss gently.
11. Remove the cheesecake from the springform pan, top with the fruit mixture, and garnish with fresh mint leaves before serving.
Tips and Conclusion
For effortless serving, consider using a hot knife to slice through the cheesecake. Simply dip the knife in hot water, wipe it dry, and slice. This technique will help create clean cuts and beautiful slices. If you have leftover cheesecake, store it in the refrigerator, covered for up to a week. You can also freeze slices for a longer period; just wrap them tightly in plastic wrap and place them in an airtight container. Enjoy them in the months to come!
Making a Fruit Salad Cheesecake is more than just following a recipe; it’s an experience filled with lovely aromas, colorful fruits, and the anticipation of that first delightful bite. The creamy cheesecake, accompanied by fresh fruit, transforms a simple dessert into something truly special, perfect for any occasion. Each forkful is like summer on a plate!
Once you've enjoyed this recipe, I invite you to explore more delightful recipes that complement this rich cheesecake. From berry compotes to crunchy granola toppings, the possibilities are endless for enhancing your dessert game. Don't forget to share your creations with family and friends on social media, sparking conversations about your baking adventures. Happy baking!
