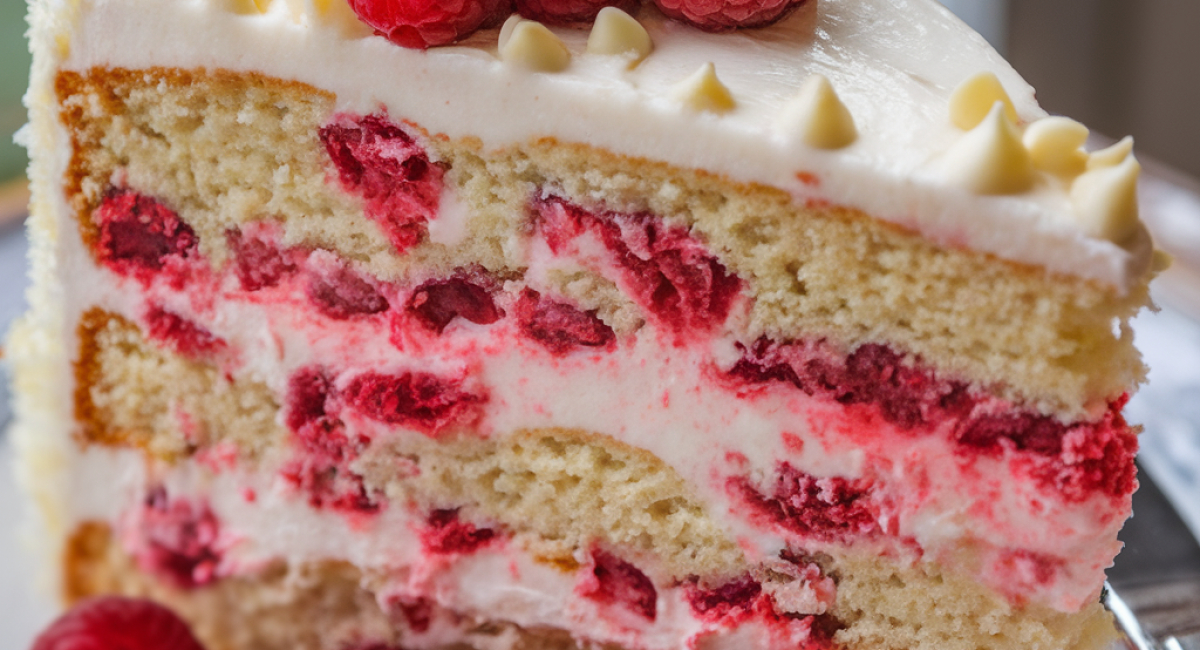
Raspberry Cream Cheese Layer Cake

Description
Imagine a cake that captures the essence of summer in every bite, with bright bursts of juicy raspberries, a creamy filling, and delicate layers that almost melt in your mouth. That’s exactly what this Raspberry Cream Cheese Layer Cake offers! It's perfect for any occasion, whether you’re celebrating a special birthday, hosting a delightful tea party, or simply indulging in a sweet treat after dinner. With its soft, moist cake and luscious cream cheese filling, everything about this dessert feels special and indulgent.
The combination of fresh raspberries with a tangy cream cheese center creates a beautiful harmony of flavors and textures. The cake layers provide the perfect base, and the fluffy whipped cream frosting adds a lightness that elevates the overall experience. If you’ve ever dreamed of impressing your family and friends with a cake that looks as good as it tastes, this recipe is for you.
In addition to being delicious, this cake is surprisingly easy to make! With a bit of patience and love, you can create a dessert that will wow anyone lucky enough to be served a slice. So roll up your sleeves, gather your ingredients, and let’s dive into making this delightful Raspberry Cream Cheese Layer Cake!
Ingredients
- For the Cake:
- - 2 1/2 cups all-purpose flour
- - 2 teaspoons baking powder
- - 1/2 teaspoon baking soda
- - 1/4 teaspoon salt
- - 1 cup unsalted butter, softened
- - 1 3/4 cups granulated sugar
- - 4 large eggs
- - 1 teaspoon vanilla extract
- - 1 cup whole milk
- - 1/2 cup sour cream
- - 1 cup fresh raspberries, lightly mashed
- For the Cream Cheese Filling:
- - 8 oz cream cheese, softened
- - 1/4 cup unsalted butter, softened
- - 1 cup powdered sugar
- - 1 teaspoon vanilla extract
- For the Raspberry Sauce:
- - 1 cup fresh raspberries
- - 2 tablespoons granulated sugar
- - 1 tablespoon lemon juice
- - 1 tablespoon cornstarch (mixed with 2 tablespoons water)
- For the Frosting:
- - 1 1/2 cups heavy whipping cream
- - 1/4 cup powdered sugar
- - 1 teaspoon vanilla extract
- This list of ingredients may seem extensive, but each part contributes to the wonderful symphony of flavors you'll enjoy. If you’re looking for substitutions, here are a few ideas:
- - If you’re short on fresh raspberries, frozen ones can be used but make sure they are thawed and drained.
- - Greek yogurt can substitute for sour cream, adding a similar tanginess with a bit more protein.
- - For a dairy-free version, consider using vegan butter and a dairy-free cream cheese alternative.
Preparation Method
1. Preheat the oven to 350°F and grease two 9-inch round cake pans, lining the bottoms with parchment paper.
2. In a medium bowl, whisk together flour, baking powder, baking soda, and salt.
3. In a large bowl, cream together 1 cup of softened butter and 1 3/4 cups of sugar until light and fluffy.
4. Add 4 large eggs one at a time, mixing well after each addition, then stir in 1 teaspoon of vanilla extract.
5. Gradually add the dry mixture and 1 cup of milk, alternating and mixing until just combined, ending with the dry mixture.
6. Fold in 1/2 cup of sour cream and 1 cup of lightly mashed raspberries.
7. Divide the batter between the prepared pans and bake for 25-30 minutes until a toothpick comes out clean.
8. Allow the cakes to cool in the pans for 10 minutes, then transfer to a wire rack to cool completely.
9. For the cream cheese filling, beat together 8 oz of softened cream cheese and 1/4 cup of softened butter, then mix in 1 cup of powdered sugar and 1 teaspoon of vanilla extract until smooth.
10. For the raspberry sauce, combine 1 cup of raspberries, 2 tablespoons of sugar, and 1 tablespoon of lemon juice in a saucepan and cook for 5 minutes, then thicken with a cornstarch slurry.
11. In a large bowl, whip 1 1/2 cups of heavy cream with 1/4 cup of powdered sugar and 1 teaspoon of vanilla extract until stiff peaks form.
12. Assemble the cake by placing one layer on a platter, spreading cream cheese filling on top, and drizzling with raspberry sauce.
13. Add the second layer, frost the cake with whipped cream, and decorate with more raspberry sauce and fresh raspberries.
14. Refrigerate the cake for at least 30 minutes before serving.
Tips and Conclusion
To maximize freshness, store any leftover cake in an airtight container in the refrigerator for up to 3 days. You can also freeze individual slices wrapped tightly in plastic wrap for up to 2 months. Just let them thaw in the refrigerator before indulging once again!
For a fun variation, consider adding lemon zest to the batter or cream cheese filling for a unique twist that pairs beautifully with the sweetness of raspberries. Or perhaps, replace the raspberries with your choice of berries—strawberries or blueberries would be delicious alternatives that still bring that vibrant color and flavor!
In summary, this Raspberry Cream Cheese Layer Cake is not just a dessert; it’s a delightful centerpiece that tells a story of flavors merging together harmoniously. From the first slice to the last crumb, each bite is a testament to the joy of baking and the love of sharing delicious food with friends and family.
As you step away from your kitchen, why not explore more recipes that harmonize beautifully with this cake? Consider treating your guests with a side of homemade vanilla ice cream or refreshing lemonade to complement the bright flavors. Don’t forget to check out our other dessert offerings—there’s a whole world of delightful creations waiting for you!
We hope you enjoy making, sharing, and savoring this lovely Raspberry Cream Cheese Layer Cake. Please feel free to share your baking adventures with us and encourage others to swoon over this delectable dish. Happy baking and even happier eating!


