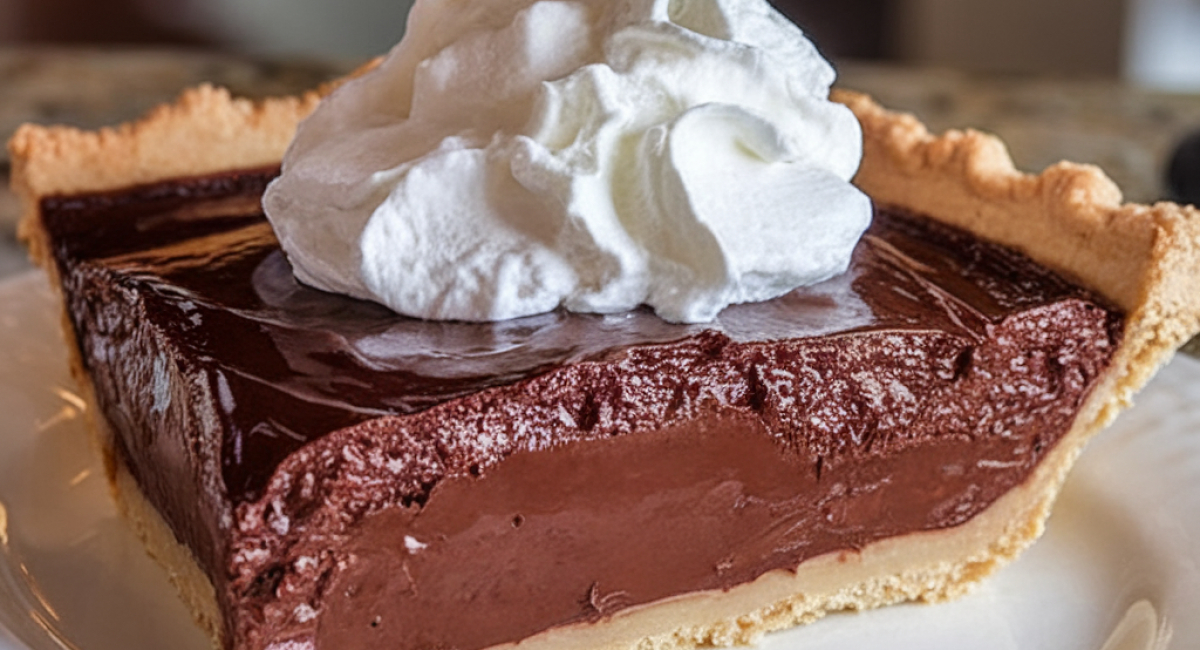
Grandma's Chocolate Pie

Description
There’s something undeniably special about indulging in a slice of rich chocolate pie—a dessert that has consistently graced the tables of family gatherings, holiday celebrations, and intimate dinners alike. At the heart of many cherished memories, Grandma's Chocolate Pie is not just a recipe; it’s an experience that captures the essence of home baking. With its luscious, creamy filling made from wholesome ingredients, this pie tempts every palate and evokes the warm nostalgia that only a homemade dessert can provide.
The origins of this delightful treat may vary from home to home, but one thing remains constant: its luxurious chocolate flavor combined with a velvety texture that melts in your mouth. This pie knows no bounds when it comes to occasions; whether you’re celebrating a birthday, comforting a friend, or simply treating yourself after a long week, a slice of this pie feels like a warm hug.
And the beauty of this dessert lies in its simplicity. With just a few essential ingredients and an easy-to-follow method, you’ll be well on your way to impressing your family and friends. The balance of sweetness and richness pairs perfectly with the airy whipped cream topping, creating a heavenly combination.
So roll up your sleeves and get ready to create a delicious memory with this Grandma’s Chocolate Pie, guaranteed to be a centerpiece at your next gathering!
Ingredients
- *For the pie filling:*
- 1 pre-baked pie crust, 9-inch
- 1 1/2 cups sugar
- 1/3 cup unsweetened cocoa powder
- 1/4 cup cornstarch
- 1/2 teaspoon salt
- 3 cups whole milk
- 4 egg yolks, beaten
- 1 teaspoon vanilla extract
- 2 tablespoons butter
- *For the topping:*
- 1 cup heavy cream
- 2 tablespoons powdered sugar
- 1/2 teaspoon vanilla extract
- Ingredient Notes:
- If you're unable to use a pre-baked pie crust, you can make your own using graham cracker crumbs or a traditional pie dough. For a gluten-free variation, look for gluten-free pie crust options available in stores.
- Whole milk gives the filling a rich, creamy texture, but if you prefer a lower-fat option, 2% milk can be used, albeit with a slight reduction in creaminess.
- In case you’re looking for a twist, consider adding a dash of espresso powder to enhance the chocolate flavor or mixing in a little peppermint extract for a festive flair.
Preparation Method
1. Gather all ingredients for the dessert.
2. In a large saucepan, mix sugar, cocoa powder, cornstarch, and salt.
3. Gradually stir in whole milk until smooth using a whisk.
4. Heat the mixture over medium heat, stirring constantly until it thickens (about five to seven minutes).
5. Reduce heat and cook for an additional two minutes to remove raw cornstarch taste.
6. In a separate bowl, whisk the beaten egg yolks.
7. Slowly add a small amount of the hot mixture to the yolks, stirring vigorously to temper.
8. Gradually pour the yolk mixture back into the saucepan while stirring.
9. Return to heat and bring to a gentle boil, stirring for another two minutes until thickened.
10. Remove from heat and stir in butter and vanilla extract until melted and combined.
11. Pour the chocolate filling into the pre-baked pie crust and press plastic wrap onto the surface to prevent a skin.
12. Chill the pie in the refrigerator for at least four hours or overnight.
13. Prepare whipped cream by mixing heavy cream, powdered sugar, and vanilla extract, then whip until stiff peaks form.
14. Once the pie is set, remove the plastic wrap and top with whipped cream.
Tips and Conclusion
For a unique spin on Grandma's Chocolate Pie, consider adding a layer of caramel sauce beneath the whipped cream for an indulgent salted caramel twist. Drizzle the sauce directly onto the chocolate filling before adding the whipped cream, ensuring an even distribution of flavors.
If you’re planning to serve the pie at a gathering, you can make it ahead of time and store the whipped cream separately in the fridge, then assemble just before serving. This will keep the whipped cream fresh and prevent any sogginess on top of the pie.
To store leftovers (if there are any!), simply cover the pie with plastic wrap and refrigerate. It will stay fresh for about 3 to 4 days, making it a great treat to have on hand, ready to satisfy any sudden chocolate cravings!
Creating Grandma's Chocolate Pie is a wonderful way to connect with family traditions while enjoying the rich flavors of homemade goodness. Each slice brings with it the warmth of collective memories, the delight of familial love, and the satisfaction of a job well done. Whether served after a family dinner, during a dessert feast, or even as a sweet surprise for guests, this pie is bound to steal the show.
As you embark on your baking adventure today, don’t hesitate to explore similar indulgent recipes shared on our site. If you enjoyed this pie, you might also want to try our decadent chocolate mousse or the timeless classic vanilla bean cheesecake. Remember to share your experience with others; your feedback and personal touch may inspire someone else to create their own stunning dessert. Happy baking!


