Creamy coconut pie

Description
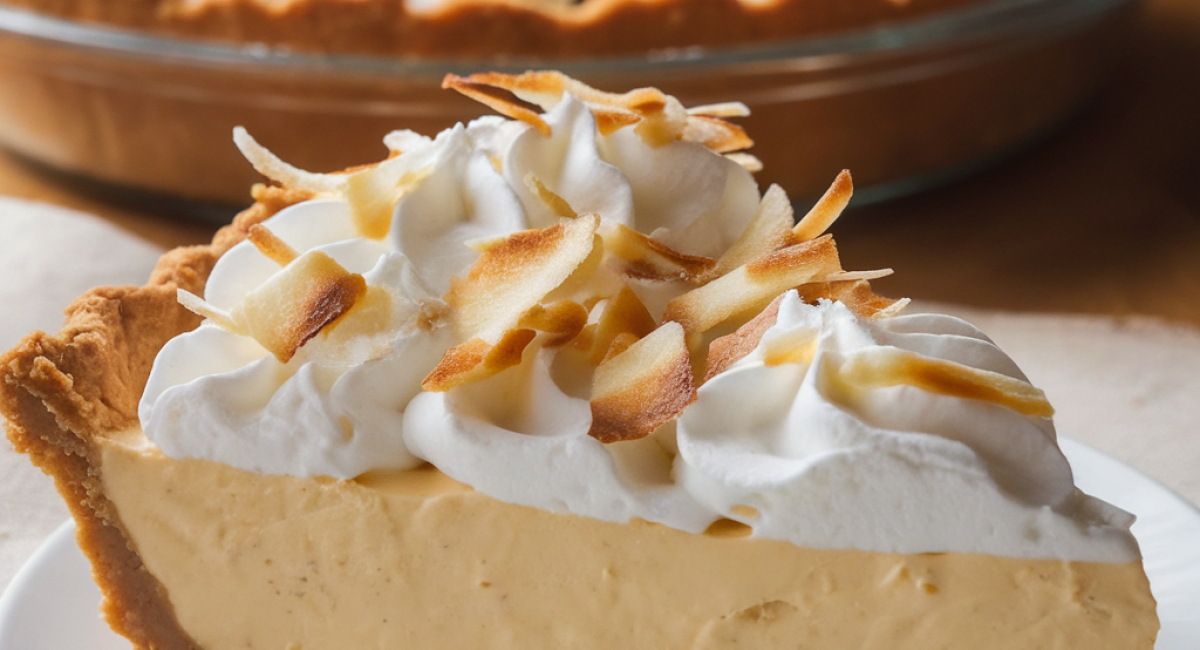
Welcome to a tropical escape right in your own kitchen! This Creamy Coconut Pie is not just any dessert; it’s a celebration of flavors and textures that transport you to sun-soaked beaches with every bite. Imagine the creamy richness of high-quality coconut milk mingling beautifully with slightly toasted coconut flakes, all nestled in a buttery pie crust. With a luscious filling that's both light and decadent, this pie is perfect for any occasion, whether it's a sunny picnic, a festive gathering, or simply indulging on a cozy evening at home.
Crafted with love, this dessert has a nostalgic essence, often evoking memories of family gatherings and summertime barbecues. With its blend of creamy texture and tantalizing coconut flavor, your taste buds are in for a delightful treat. Plus, the ease of preparation makes it an accessible choice for bakers of all skill levels. Ready to dive in? Let’s get started!
Ingredients
- Crust:
- 1 prepared pie crust
- Filling:
- 1/3 cup cornstarch
- 1 cup heavy cream
- 1 teaspoon vanilla extract
- 1 cup coconut flakes, divided
- 3/4 cup granulated sugar
- 3 large egg yolks, slightly beaten
- 1 can (13.5 ounces) high-quality coconut milk
- 2 tablespoons salted butter
- Stabilized Whipped Cream Topping:
- 2 tablespoons powdered sugar
- 1 teaspoon unflavored gelatin
- 1 cup heavy cream
- 3 tablespoons cold water
- 1 teaspoon vanilla extract
Preparation Method
1. Preheat the oven to 350 degrees Fahrenheit.
2. Spread 1 cup of sweetened coconut flakes on a parchment-lined baking sheet and toast for 5-7 minutes, stirring occasionally, until golden brown. Set aside to cool.
3. Separate the yolks from three large eggs and beat them in a bowl until smooth.
4. In a saucepan, whisk together granulated sugar, cornstarch, heavy cream, and coconut milk. Heat over medium-high heat, stirring continuously until it bubbles, then stir for 2 minutes until thickened.
5. Temper the egg yolks by mixing a small amount of hot custard with them, then return the mixture to the saucepan and heat for another 90 seconds.
6. Remove from heat and stir in salted butter and vanilla extract until melted. Mix in half of the toasted coconut flakes.
7. Pour the filling into the prepared pie crust and let it cool for 15 minutes before refrigerating for at least 2 hours.
8. Bloom unflavored gelatin in cold water for 5 minutes.
9. Whip heavy cream with powdered sugar and vanilla extract until soft peaks form. Heat bloomed gelatin until liquefied, then mix into the whipped cream to stabilize it.
10. Once the pie is set, spread or pipe the stabilized whipped cream on top and sprinkle with remaining toasted coconut flakes.
11. Chill the pie until ready to serve for enhanced flavors and clean slices.
Tips and Conclusion
Preserving the integrity of your pie is vital for longer enjoyment. If you find yourself with leftovers (which is very rare with this tempting dessert), cover the pie with plastic wrap or store it in an airtight container. It can be kept in the refrigerator for about 3 to 5 days. If you want to serve it a bit later, why not explore variations of this recipe? For a deeper flavor, try adding a hint of lime zest to the custard or a splash of dark rum for a tropical twist. You can also substitute the heavy cream with coconut cream for an even richer texture.
Creating this Creamy Coconut Pie is more than just following a recipe; it’s about embracing the joy of cooking and sharing delightful flavors. As you take your first bite, the combination of creamy coconut filling, buttery crust, and fluffy whipped topping envelops your taste buds in pure bliss. It’s a dessert that brings happiness, memories, and the essence of the tropics to your table.
So go ahead, whip out your baking tools and dive into this wonderful journey. And while you’re at it, don’t forget to explore other tropical recipes on our site, each crafted to inspire and delight. From refreshing pineapple tarts to classic key lime pies, there’s a banquet of flavors waiting for you. Share this Creamy Coconut Pie recipe with friends and family, and watch their faces light up with joy as they savor the delicious creation you brought to life! Happy baking!


