Frozen s’mores

Description
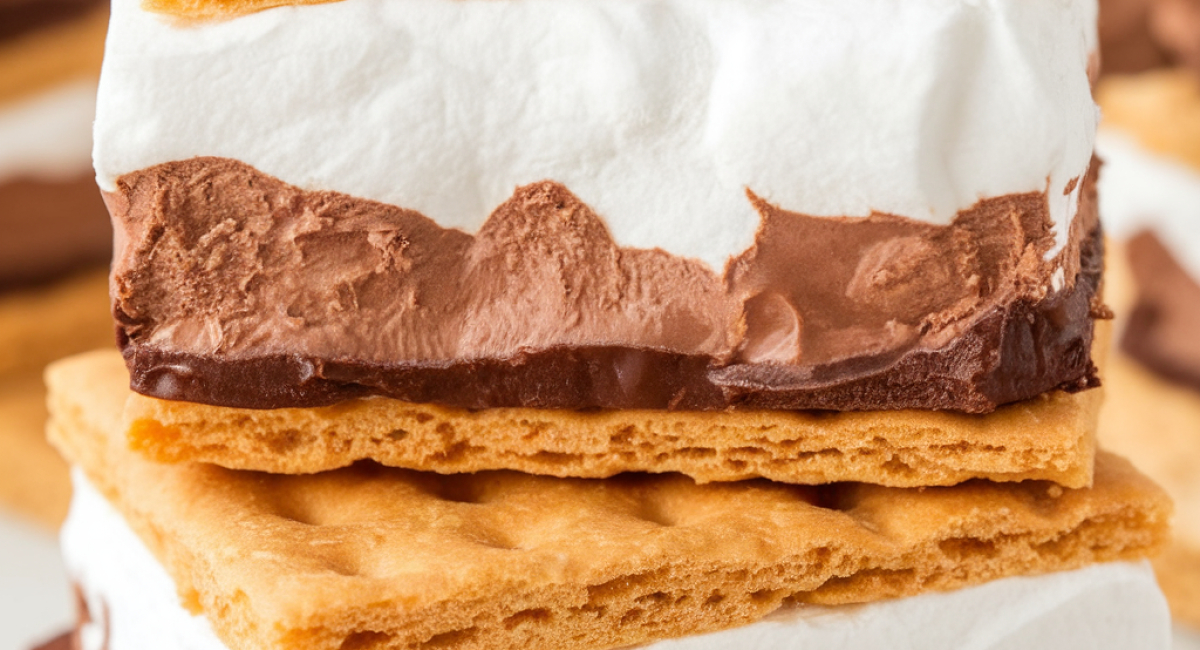
Are you ready to take a delicious and nostalgic journey back to your childhood? Our Frozen S'mores are the perfect treat to satisfy that sweet tooth while bringing a sense of summer fun right into your kitchen! This delightful dessert combines the classic flavors of campfire s'mores—rich chocolate, creamy marshmallow, and crunchy graham crackers—without requiring any of the hassle of outdoor cooking.
This layered dessert is as easy as pie (or should we say s'mores?) and can be prepared in just a few simple steps. The experience of making them is just as enjoyable as indulging in the final product, making it ideal for gatherings with family and friends, or just a cozy night in. Each frozen bite delivers a wonderfully creamy texture with the satisfying crunch of graham crackers, easily layered to create a stunning presentation. Enjoy them after a meal or as a refreshing treat on a warm day.
Whether you're a novice in the kitchen or an experienced home chef looking for a fun and easy dessert, you'll love this recipe. Did I mention that you can customize it with different flavors? Read on to make your very own frozen s'mores that are sure to impress!
Ingredients
- For the crust:
- One 8-ounce container of frozen whipped topping, thawed
- Fifteen full-size graham crackers, approximately 8.3 ounces, divided
- For the creamy marshmallow layer:
- Four ounces of cream cheese, softened
- One approximately 7-ounce jar of marshmallow crème (e.g., Marshmallow Fluff)
- Two cups of whipped topping
- For the chocolate layer:
- Three cups of heavy cream
- One 5.9-ounce package of instant chocolate pudding mix
- One cup of whipped topping
- Optional toppings and variations:
- Chocolate sauce or fudge for drizzling
- Mini chocolate chips or crumbled graham crackers for garnish
- Peanut butter or Nutella for a nutty twist
- Fresh fruit like strawberries or bananas for a fruity addition
Preparation Method
1. Thaw 8-ounce whipped topping and let cream cheese reach room temperature for 45 minutes.
2. Line a 9x13-inch baking pan with two sheets of parchment paper in a cross shape.
3. Break 8 graham crackers in half and arrange them in a single layer at the bottom of the pan.
4. In a mixer, combine softened cream cheese and marshmallow crème, mixing for 30 seconds until smooth.
5. Fold in 2 cups of thawed whipped topping until combined, then spread over the graham crackers.
6. In the same bowl, whisk together 3 cups heavy cream and instant chocolate pudding mix until smooth.
7. Fold in 1 cup of whipped topping until combined, then spread over the marshmallow layer.
8. Break 7 graham cracker sheets in half and arrange them on top of the chocolate layer, sealing it.
9. Cover the pan and freeze for at least 6 hours or overnight.
10. Once firm, lift the dessert out using the parchment paper and cut into 15 squares.
Tips and Conclusion
To elevate your frozen s'mores experience, consider drizzling some chocolate sauce or fudge over the top right before serving. You can also sprinkle a handful of mini chocolate chips or crumbled graham cracker on top for added texture and flavor. If you're feeling adventurous, try spreading a thin layer of peanut butter or Nutella on top of your marshmallow layer before adding the chocolate mixture for a delicious nutty twist. Additionally, fresh fruit like strawberries, raspberries, or sliced bananas can add a refreshing contrast to the sweetness.
If you have any leftovers (which is unlikely but worth mentioning), store them in an airtight container in the freezer for up to two weeks. Just remember to slice them before freezing for easy access later!
Creating your own Frozen S'mores at home is not only a fun activity but also an easy way to enjoy a classic summertime treat all year round. The layering of flavors and textures will impress your family and friends, who will undoubtedly request this delightful dessert again and again.
Prepare to take a delightful bite into creamy marshmallow, luscious chocolate, and the crunchy signature taste of graham crackers, all while reminiscing about countless campfire memories.
Did this recipe spark your interest in exploring more desserts? We have a treasure trove of delightful recipes to share! Consider browsing our collection of no-bake desserts, scrumptious chocolate treats, or classic summer recipes that will keep your gatherings lively and delicious.
Don't forget to share your frozen s'mores creations on social media and encourage your friends to try it. Happy cooking!


