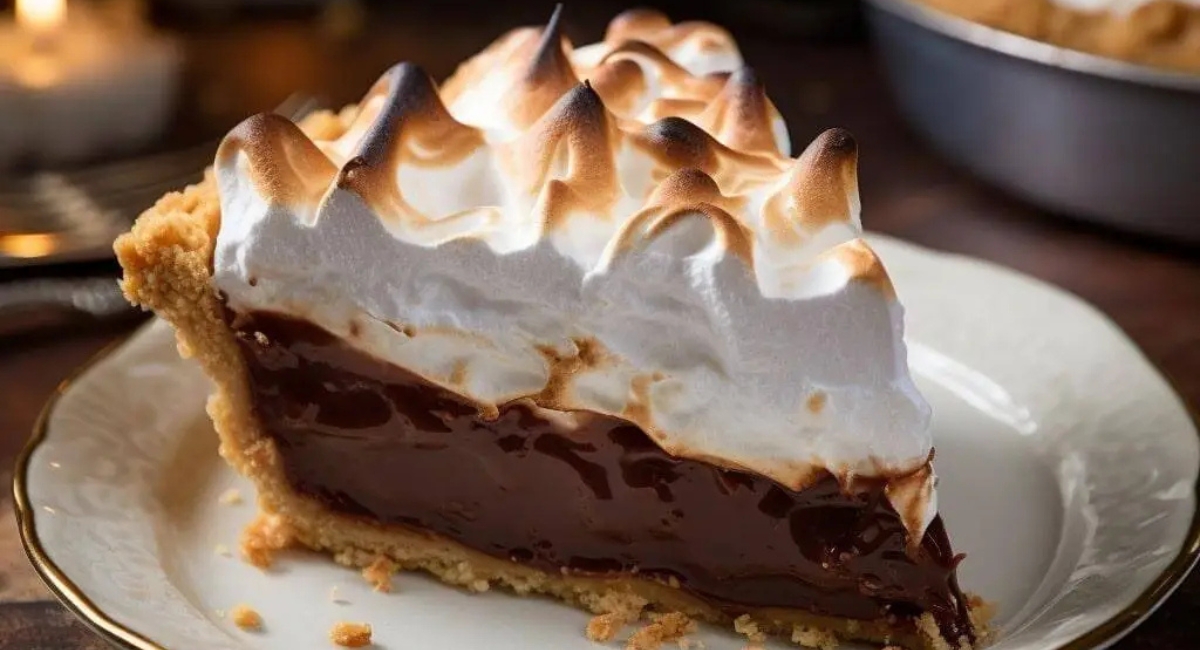
Homemade Chocolate Meringue Pie

Description
Indulge yourself in the exquisite blend of rich chocolate, fluffy meringue, and a perfectly baked crust with this homemade Chocolate Meringue Pie. This dessert, a classic from the American South, is much more than just a sweet treat; it is a symphony of flavors and textures that evoke nostalgia with every bite. Whether enjoyed during festive celebrations or as a comforting end to a cozy family dinner, this pie embodies the essence of comfort food.
What makes this Chocolate Meringue Pie so special lies not only in its delectable taste but also in the artistry involved in its preparation. The buttery, flaky crust serves as a sturdy foundation for the luscious chocolate filling that oozes velvety goodness. Topping it all off, the meringue—made from egg whites, whipped to airy perfection—offers a delightful contrast to the rich filling underneath. Baking the meringue just until it reaches a tender golden hue gives it a beautifully toasted appearance and irresistible lightness.
Despite its seemingly complex layers, this pie is surprisingly straightforward to prepare. With step-by-step guidance, you’ll find that creating this delightful dessert can be a rewarding and even therapeutic experience. The aromatic smell of chocolate mingling with sweet meringue wafting through your kitchen will make the process well worth it. Gather your ingredients and prepare to treat yourself and your loved ones to a slice of bliss!
Ingredients
- For the Crust:
- 1 1/2 cups (180g) all-purpose flour
- 1/4 teaspoon salt
- 1/3 cup (67g) granulated sugar
- 6 tablespoons (85g) unsalted butter, chilled and cut into pieces
- 3-4 tablespoons ice water
- For the Filling:
- 3/4 cup (150g) granulated sugar
- 1/4 cup (21g) unsweetened cocoa powder
- 3 tablespoons (24g) cornstarch
- 1 3/4 cups (414ml) evaporated milk
- 1 can (12oz/355ml) water
- 1 teaspoon vanilla extract
- 4 large eggs, lightly beaten
- 1/4 cup (57g) unsalted butter
- For the Meringue:
- 4 large egg whites, room temperature
- 1/4 teaspoon cream of tartar
- 1/2 cup (100g) granulated sugar
Preparation Method
1. Prep ingredients and tools, using a food processor for the crust.
2. Pulse flour, salt, and sugar in the processor until mixed.
3. Add chilled butter and pulse until coarse crumbs form.
4. Gradually add ice water, pulsing until the dough clumps together.
5. Turn dough onto a floured surface, form into a disc, and wrap in plastic wrap. Chill for 30 minutes.
6. Preheat oven to 400°F.
7. Roll out chilled dough to 12 inches, transfer to a 9-inch pie pan, and trim excess.
8. Line crust with foil and fill with weights. Bake for 15 minutes, then remove weights and bake for another 10-12 minutes until browned. Cool completely.
9. In a saucepan, whisk sugar, cocoa powder, and cornstarch. Gradually whisk in evaporated milk and water until smooth.
10. Heat mixture over medium heat, whisking until it thickens (5-7 minutes).
11. Remove from heat and temper eggs by whisking in a small amount of hot mixture, then combine with the filling.
12. Return to low heat and cook for 2 more minutes while whisking. Stir in butter until melted.
13. Pour filling into cooled crust and cover with plastic wrap. Chill for at least 2 hours.
14. Prepare meringue by whisking egg whites, cream of tartar, and half the sugar in a heatproof bowl over simmering water until warm and foamy.
15. Transfer to a mixer, beat until soft peaks form, then gradually add remaining sugar and beat until stiff peaks form.
16. Spread meringue over filling, sealing edges and creating peaks.
17. Preheat oven to 350°F and bake for 10-12 minutes until meringue is lightly golden.
18. Allow pie to cool completely before slicing and serve.
Tips and Conclusion
For an exciting twist, consider adding a splash of peppermint extract to the chocolate filling for an enchanting minty flavor, especially delightful during the holidays. If you’re looking for a lighter version, substitute the granulated sugar with a sugar alternative such as stevia, adjusting it according to the package instructions. This makes the pie more suitable for those watching their sugar intake without compromising your dessert game.
Additionally, if you’re preparing for a large gathering, consider making mini versions of this pie in individual ramekins! These portions are perfect for serving and create an impressive presentation. Simply adjust the baking time as needed, keeping an eye on those delightful golden meringue peaks.
Crafting your own Chocolate Meringue Pie is a soulful endeavor, merging simple ingredients into a delightful dessert that can elevate any gathering. The experience of preparing this dish—mixing, baking, and finally enjoying its rich flavors—is a joyous journey that you’ll look forward to sharing with family and friends.
Once you've mastered this recipe, why not explore other delightful dessert options? From creamy cheesecakes to enticing fruit tarts, there are endless adventures in baking just waiting for you. Don't forget to share your Chocolate Meringue Pie with those you love, inviting them into the deliciousness you’ve created. Happy baking!


