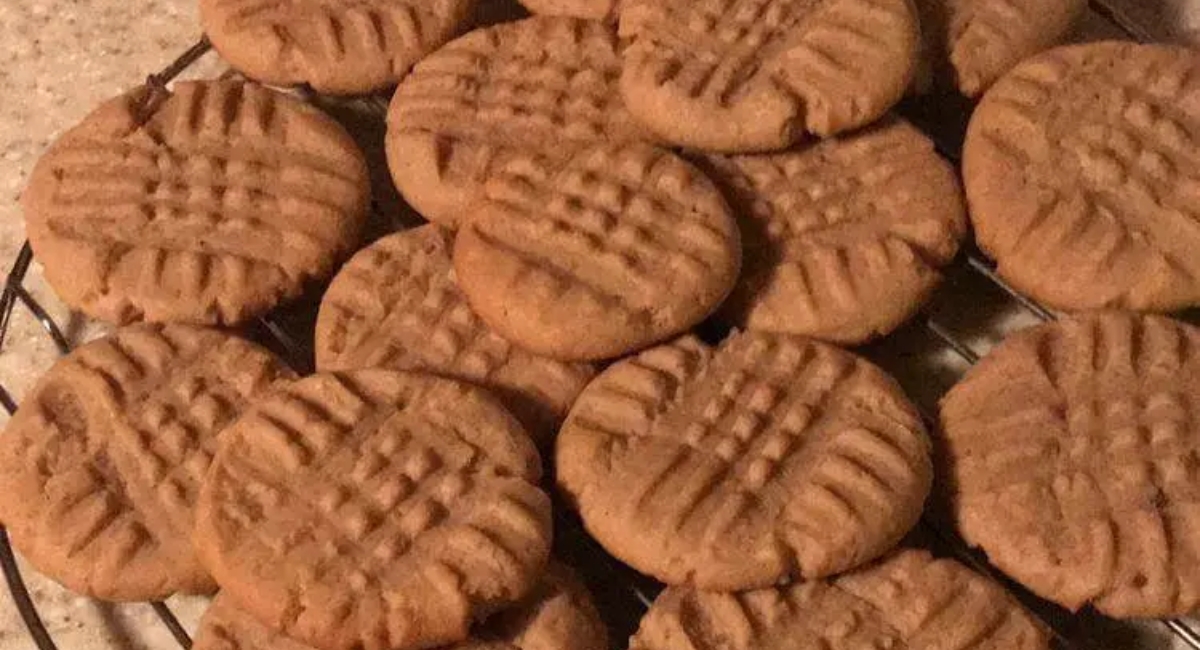
My Favorite Peanut Butter Cookies
Description
When it comes to comfort food, few treats can compete with a warm, homemade peanut butter cookie. These delightful morsels combine a wonderfully nutty flavor with a rich, buttery texture, creating a cookie experience that's truly memorable. Originating from the Southern United States, peanut butter cookies have become a beloved staple across the nation and beyond, often invoking fond memories of baking alongside loved ones during the holidays or on rainy afternoons.
What makes these cookies particularly special is their perfect balance of sweetness and saltiness, offering a satisfying crunch with a soft, chewy center that better than store-bought varieties. The addition of both granulated and brown sugar enhances their depth of flavor, while the unique ingredient duo of peanut butter and shortening gives them a distinct richness. Not only are they incredibly easy to whip up, with minimal prep and just a handful of ingredients, but the joy they bring as they fill your kitchen with a heavenly aroma is simply unparalleled.
Whether you're satisfies with a classic version, looking for a gluten-free alternative, or even craving a chocolate twist, these peanut butter cookies serve as a canvas for your creativity. Let's dive into this delightful baking experience that promises to leave you, your family, and your friends coming back for more!
Ingredients
- For the Cookie Dough:
- - Half a cup of granulated sugar
- - Half a cup of packed brown sugar
- - Half a cup of creamy or crunchy peanut butter
- - A quarter cup of shortening
- - A quarter cup of softened unsalted butter
- - One large egg
- - A quarter teaspoon of salt
- - Half a teaspoon of baking powder
- - Three quarters of a teaspoon of baking soda
- - One and a quarter cups of all-purpose flour
- Optional Add-Ins:
- - One cup of chocolate chips (semi-sweet or dark)
- - Half a cup of chopped nuts (walnuts or pecans)
- - One teaspoon of vanilla extract for an added flavor boost
Preparation Method
1. Gather all ingredients on a clean kitchen counter.
2. In a large mixing bowl, combine egg, softened butter, shortening, peanut butter, granulated sugar, and brown sugar.
3. Beat the mixture with a wooden spoon or hand mixer for 2 to 3 minutes until light and fluffy.
4. Cover the bowl and refrigerate for at least two hours, or overnight for better flavor.
5. Preheat the oven to 373 degrees Fahrenheit.
6. Line two baking sheets with parchment paper or silicone mats.
7. Scoop out dough balls about 1.25 inches in diameter, spaced 3 inches apart on the sheets.
8. Flatten each dough ball with a fork to create a criss-cross pattern, optionally dipping the fork in sugar.
9. Bake cookies for 9 to 10 minutes until light golden around the edges and slightly soft in the center.
10. Let cookies rest on the baking sheets for 5 minutes before transferring to a wire rack or plate to cool completely.
Tips and Conclusion
For an exciting twist, consider experimenting with the type of peanut butter you use. If you prefer a more robust flavor, opt for natural or crunchy peanut butter, which delivers a richer texture. For those seeking a gluten-free alternative, simply swap out the all-purpose flour for a gluten-free blend.
If you want to take your cookies over the top, try adding a sprinkle of sea salt on top just before baking or sandwiching two cookies around a scoop of ice cream to create the ultimate peanut butter cookie ice cream sandwich. Whatever variation you choose, these cookies have a way of becoming the star of any gathering!
Baking peanut butter cookies is not only a delightful culinary adventure, but it also creates moments of joy as they waft through your home, pulling everyone into the kitchen for a taste. The process of measuring, mixing, and baking offers both satisfaction and the sweet anticipation of glorious treats to come.
Once cooled, you can enjoy these cookies fresh from the oven, share them around the dinner table, or package them up for a thoughtful homemade gift. Your friends and family will surely appreciate the time and love you put into making these delicious cookies!
If you loved this recipe, you might also enjoy exploring other sweet treats on our site. From gooey chocolate chip cookies to indulgent brownies, there are plenty of options guaranteed to satisfy your sweet tooth. Don’t forget to share this recipe with fellow bakers and cookie lovers, and keep browsing our site for more delightful recipes! Happy baking!
