Learn Recipes Easy

Red Velvet Rolls

Red Velvet Rolls

Description

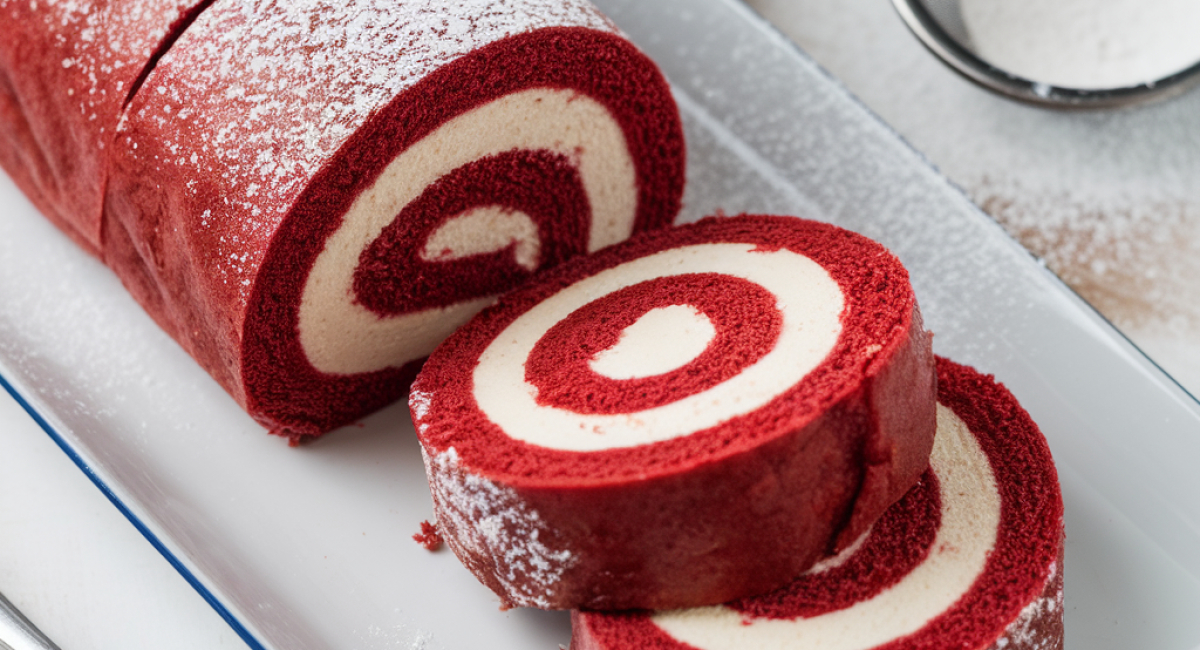
Welcome to the delightful world of Red Velvet Rolls, a charming twist on the classic red velvet cake that will make your taste buds sing with joy! Originating from the Southern United States, red velvet desserts have a rich history that dates back to the early 20th century. The vibrant crimson color and the subtle hint of cocoa create a visually stunning and deliciously unique treat. These rolls are not just a feast for the eyes; they are soft, fluffy, and decadently sweet, making them the perfect addition to any gathering or special occasion.

What makes these Red Velvet Rolls truly special is their versatility. They can be enjoyed as a delightful breakfast, a sweet snack, or a dessert that will impress your friends and family. Imagine the aroma wafting through your kitchen as they bake, filling your home with warmth and sweetness. The cream cheese frosting swirled inside adds a lusciousness that elevates each bite to a heavenly experience.

Preparing these rolls can be a fun activity to share with loved ones, whether it's baking with children or surprising a partner with a homemade treat. Their vibrant color and delicious flavor make them a memorable choice for holidays, birthdays, or simply to satisfy a sweet craving.

Ingredients

Preparation Method

Begin by preparing your workspace. Clear your kitchen counter and gather all the ingredients and tools you’ll need. This helps the process flow smoothly and makes the experience more enjoyable. Preheat your oven to 350°F (175°C) so it’s ready for your rolls when they’re done rising.

In a large mixing bowl, combine the all-purpose flour, granulated sugar, baking soda, baking powder, salt, and cocoa powder. Whisk these dry ingredients together until they are well combined. This step is crucial as it ensures that the leavening agents are evenly distributed throughout the flour, leading to a perfectly risen roll.

In a separate bowl, mix the wet ingredients. Start by whisking together the buttermilk, egg, vegetable oil, red food coloring, and vanilla extract until they are fully combined. The vibrant red color will start to shine through, making you even more excited to bake.

Next, gently fold the wet mixture into the dry ingredients using a spatula. Be careful not to overmix; you want to combine everything until just moistened. It’s okay if there are a few lumps; this will help keep your rolls light and fluffy.

Once you have your dough ready, lightly flour your work surface and turn out the dough. Knead it gently for a minute or two, just until it comes together. You’ll notice the dough is soft and slightly sticky. That’s perfect! Shape it into a rectangle about ¼ inch thick, ensuring it’s even, which will help in rolling.

Now it’s time to prepare the filling. In a medium bowl, combine the softened unsalted butter, brown sugar, and cinnamon until smooth. Spread this mixture evenly over the surface of your rolled-out dough, leaving about a ½ inch border around the edges.

For the cream cheese filling, in another bowl, beat together the softened cream cheese, powdered sugar, and vanilla extract until smooth and creamy. Spread this delightful mixture over the cinnamon filling, making sure it covers the surface well for that delicious creaminess in every bite.

Now comes the fun part! Starting from one long edge, carefully roll the dough tightly into a log. Use your hands to keep the roll tight and even, ensuring all the filling stays inside. Pinch the seam at the end to seal it.

Once your log is rolled, cut it into 12 equal pieces using a sharp knife or a bench scraper. Place the rolls cut side up in a greased baking dish, leaving a little space between each one to allow for rising. Cover the dish with a clean kitchen towel and let the rolls rise in a warm place for about 30-45 minutes, or until they have doubled in size. This step is essential for achieving that soft, fluffy texture we all love.

After they’ve risen, it’s time to bake! Place the rolls in the preheated oven and bake for 25-30 minutes or until they are golden brown and a toothpick inserted in the center comes out clean. The sweet aroma of cinnamon and cream cheese will fill your kitchen, making it hard to resist the temptation to dive in early.

While your Red Velvet Rolls are baking, prepare the cream cheese frosting. In a mixing bowl, beat the softened cream cheese and unsalted butter together until creamy and smooth. Gradually add the powdered sugar, mixing until well combined. If the frosting is too thick, add a tablespoon or two of milk to achieve your desired consistency. Finally, stir in the vanilla extract.

Once the rolls are out of the oven, allow them to cool for a few minutes before spreading the cream cheese frosting generously over the top. The warmth of the rolls will slightly melt the frosting, making it even more delicious.

Tips and Conclusion

For an added touch, consider garnishing your Red Velvet Rolls with chopped nuts, such as pecans or walnuts, or a sprinkle of cocoa powder for a beautiful presentation. If you want to make these rolls even more festive, you can add a few chocolate chips into the filling for an extra layer of flavor. They can be stored in an airtight container at room temperature for up to two days or in the refrigerator for a week. Just be sure to let them come to room temperature before serving for the best taste.


Preparing Red Velvet Rolls is not just about the final product; it's about the experience of creating something beautiful and delicious. The blend of flavors and textures makes each bite a celebration. Whether you enjoy them with a cup of coffee for breakfast, share them at a gathering, or indulge yourself after a long day, they are sure to bring joy to your table.

If you loved this recipe, consider exploring other delightful desserts such as Cinnamon Rolls, Chocolate Chip Cookies, or even a classic Red Velvet Cake. Feel free to share this recipe with your friends and family, and encourage them to dive into the world of baking! Keep browsing our site for more delicious recipes and tips that will inspire your culinary adventures. Happy baking!

Recommended Recipes

Most famous but forgotten dessert from the 70s and 80s
Homemade Cronuts
Homemade Cronuts
Creamy Garlic Steak and Shrimp
What pizzerias don't want you to know, you'll thank me after this recipe
Garlic Parmesan Chicken Pasta Bake
Sweet Potato Pie
Sweet Potato Pie
Maple Honey Butter Sweet Potato Cornbread
I swear this is the easiest potato you can make and it's yummy!