Butterfinger Balls

Description
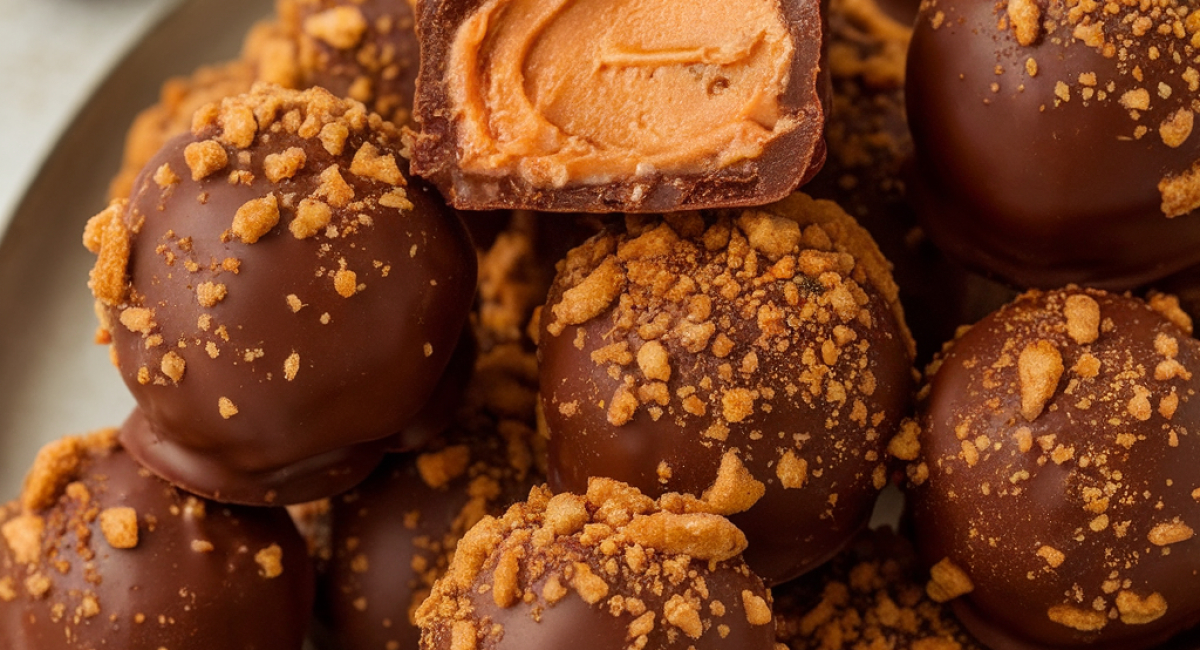
Butterfinger Balls are a delightful treat that combines the irresistible flavors of chocolate and peanut butter, reminiscent of the beloved Butterfinger candy bar. This no-bake dessert is perfect for satisfying your sweet tooth, making it an ideal addition to any gathering or a simple indulgence at home. The crunchy peanut butter center, rolled in a luscious chocolate coating, provides a satisfying contrast in texture and taste. Originating from the creativity of home bakers looking to replicate their favorite candy bars, this recipe is not only easy to make but also evokes fond memories of childhood treats.
With just a handful of ingredients, you’ll discover that Butterfinger Balls are not only fun to prepare but also offer endless opportunities for customization. Whether you're a novice in the kitchen or a seasoned chef, this recipe invites you to get involved, experiment, and enjoy every moment of the cooking process. So roll up your sleeves and get ready for a sweet adventure that will leave you and your loved ones craving more!
Ingredients
- For the Peanut Butter Filling:
- 1 cup creamy peanut butter
- 1 cup powdered sugar
- 1 cup crushed graham crackers
- 1 teaspoon vanilla extract
- For the Chocolate Coating:
- 2 cups semi-sweet chocolate chips
- 1 tablespoon coconut oil or shortening for melting
- Optional Garnishes:
- Chopped peanuts for sprinkling
- Sea salt for a touch of flavor
- Colored sprinkles for a festive touch
Preparation Method
Tips and Conclusion
If you want to make a delightful variation of Butterfinger Balls, consider adding a few drops of orange or almond extract to the peanut butter filling for a unique twist on flavor. You can also experiment with different types of chocolate—dark chocolate or white chocolate can provide a different but equally delicious taste. For storage, keep the Butterfinger Balls in an airtight container in the refrigerator, where they can last for about a week. If you want to enjoy them longer, you can freeze them for up to three months. Just make sure to separate layers with parchment paper to prevent sticking.
Making Butterfinger Balls is not just about satisfying your sweet cravings; it’s an experience filled with creativity, nostalgia, and joy. As you roll each ball and dip it in chocolate, you’ll find yourself lost in the delightful process of creating something truly special. The moment you take a bite of these creamy peanut butter treats, you’ll be transported back to carefree days of childhood, filled with sweetness and happiness.
Don’t forget to share this recipe with friends and family—they’ll love joining in on the fun and tasting these delicious treats. If you enjoyed making Butterfinger Balls, you might also want to explore more delightful recipes on our site, such as Chocolate Truffles, No-Bake Cheesecake, or Peanut Butter Cookies. Each recipe is designed to bring joy to your kitchen and deliciousness to your table. Happy cooking, and may your sweet adventures continue!


