Butterfinger Balls Recipe

Description
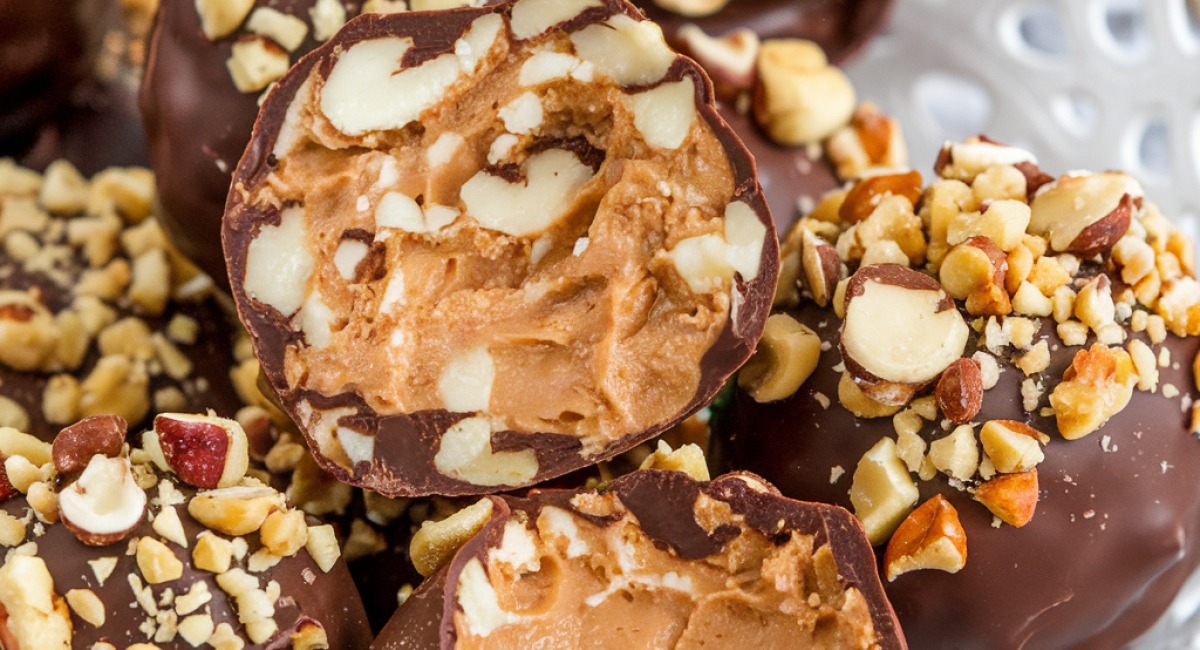
If you have a sweet tooth and a love for the iconic Butterfinger candy bars, then you’re in for a delightful treat! This Butterfinger Balls Recipe is a simple yet indulgent way to enjoy the classic flavor of Butterfinger in a completely new form. These delectable bite-sized morsels combine crushed Butterfinger bars, creamy peanut butter, and a touch of sweetness from powdered sugar, all coated in a rich layer of melted chocolate. It’s the perfect no-bake treat that is especially wonderful for gatherings, parties, or just for satisfying your cravings.
Flavors of nostalgia envelop each bite, reminiscent of childhood candy moments, while the combination of textures – the crunch from the Butterfinger, the creaminess of peanut butter, and the smooth chocolate coating – creates an irresistible experience. The ease of preparation makes it an ideal recipe for both amateur cooks and seasoned bakers. Plus, it’s adaptable! Feel free to customize it with different types of chocolate or even add in some crushed nuts or sprinkles to enhance the fun.
Get ready to roll up your sleeves and create a delightful treat that not only tastes amazing but also brings people together. Whether you’re indulging alone or sharing with friends and family, these Butterfinger balls are sure to be a hit!
Ingredients
- - 1 (10 oz) package of Butterfinger candy bars (or about 8-10 bars)
- - 1 cup of peanut butter (smooth or crunchy)
- - 1 ½ cups of powdered sugar
- - 2 cups of milk chocolate chips (or semi-sweet chocolate chips)
- - 1 tablespoon of vegetable oil (optional, for a smoother chocolate coating)
- Substitutions:
- If you prefer dark chocolate, feel free to swap the milk chocolate chips for dark chocolate chips for a richer taste. Additionally, you can experiment with almond butter or cashew butter as a unique twist on the classic peanut butter filling.
Preparation Method
1. Unwrap Butterfinger bars and crush them in a food processor or zip-top bag until crumbly with some chunky pieces.
2. In a mixing bowl, combine crushed Butterfinger, peanut butter, and powdered sugar until thick and moldable.
3. Roll the mixture into 1-inch balls and place them on a lined baking sheet.
4. Chill the balls in the refrigerator for at least 30 minutes to firm up.
5. Melt chocolate chips in a microwave or double boiler, stirring until smooth. Add vegetable oil for a glossier finish if desired.
6. Dip each chilled ball into the melted chocolate, ensuring full coverage, and place back on the lined baking sheet.
7. Optionally, sprinkle toppings like crushed peanuts or sprinkles on the chocolate before it sets.
8. Allow the chocolate to harden at room temperature or refrigerate for 10-15 minutes to speed up the process.
Tips and Conclusion
For an extra special touch when serving your Butterfinger balls, consider presenting them in decorative paper cups or placing them in a fun treat box. It not only enhances their appearance but also makes them perfect for gifting! If you have leftovers (which is a rarity!), store them in an airtight container in the refrigerator. They can last for up to a week—if they last that long!
Feel free to experiment with variations. You might try adding a drizzle of white chocolate on top for a striking contrast, or incorporate chopped nuts for added crunch. Consider blending in some Crispy Rice cereal to the filling to add a unique twist!
There you have it! The Butterfinger Balls Recipe is a wonderfully simple treat that brings together an iconic flavor in a delightful new form. The process of making these really captures the essence of fun in the kitchen, bringing together a few wonderful ingredients to create a spectacular outcome. The delightful combination of crunchy, creamy, and chocolatey textures makes these balls an instant favorite for anyone who tries them. They are perfect for sharing at parties, giving as gifts, or simply savoring at home.
Explore more of our sweet treat recipes to expand your dessert repertoire! Perhaps you’d like to try making Peanut Butter Chocolate Truffles, or maybe you’re in the mood for some classic Rice Krispie Treats. Whatever the occasion, there’s something heartfelt and special about homemade sweets that are sure to delight.
Once you’ve made these Butterfinger balls, don’t forget to share them with friends and family or post about your culinary adventure on social media. Enjoy the sweet bliss, and keep browsing our site for more delicious recipes that are bound to satisfy your taste buds!


