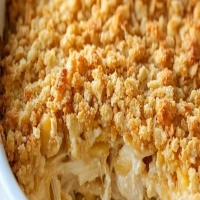
Easy Breakfast Cheese Danish

Description
Imagine waking up on a leisurely Sunday morning, the sun streaming through your kitchen window, and the inviting aroma of fresh pastries wafting through your home. This is exactly the sensation you’ll feel when you prepare our Easy Breakfast Cheese Danish. A delightful fusion of flaky pastry and creamy filling, these Danishes are inspired by the traditional pastries of Denmark, known for their rich history and delightful flavors.
What makes our rendition particularly special is how effortlessly it comes together. Using store-bought puff pastry, even novice bakers can create these gorgeous treats that look and taste homemade. The comforting taste of the cream cheese filling, combined with a hint of lemon and vanilla, elevates the dish, making it a perfect companion for your morning coffee or afternoon tea.
Whether you're hosting a brunch, needing a quick breakfast option, or simply looking for a sweet treat to brighten your day, these Cheese Danishes promise satisfaction in every flaky bite. So roll up your sleeves and get ready to impress your friends and family with this charming pastry that feels just as special as it tastes.
Ingredients
- For the Dough
- 1 sheet of puff pastry (thawed, if frozen)
- For the Cream Cheese Filling
- 4 ounces cream cheese (softened to room temperature)
- 2 tablespoons granulated sugar
- 1 teaspoon lemon juice (freshly squeezed for the best zing)
- 1/2 teaspoon vanilla extract
- 1 egg yolk (for a rich, velvety texture)
- For the Egg Wash
- 1 egg (beaten with a teaspoon of water)
- Optional Add-Ins
- You can personalize your Cheese Danish with a variety of flavors:
- 1 tablespoon of your favorite jam or fruit preserves (strawberry or apricot work great)
- A sprinkle of cinnamon (for a warm, spicy note)
- Fresh fruit such as berries, sliced apples, or peaches (for a fresh twist)
Preparation Method
1. Thaw puff pastry at room temperature for 30 to 40 minutes until pliable.
2. Roll out the thawed pastry on a floured surface into a rectangle larger than original size.
3. In a bowl, mix softened cream cheese, granulated sugar, lemon juice, vanilla extract, and egg yolk until smooth and fluffy.
4. Cut the pastry into 4x4 inch squares.
5. Shape each square by folding corners to the center or creating a border.
6. Spoon a tablespoon of cream cheese filling into the center of each square.
7. Preheat the oven to 400°F (200°C).
8. Brush each Danish with egg wash made from a beaten egg and water.
9. Line a baking sheet with parchment paper and place the Danishes on it.
10. Bake for 15 to 20 minutes until golden brown.
11. Let the Danishes cool slightly on the baking sheet before transferring to a wire rack.
Tips and Conclusion
To elevate your Cheese Danishes even further, consider serving them with a simple glaze or drizzle of icing. Mix together powdered sugar with a splash of milk (or cream) until you reach your desired consistency, then drizzle over the warm pastries. Additionally, these Danishes can be stored in an airtight container at room temperature for up to two days. For longer storage, place them in the refrigerator and reheat them in the oven for a couple of minutes to regain their flakiness before serving.
While they are undeniably delightful on their own, pairing them with a refreshing fruit salad or a robust cup of coffee will enhance the experience. If you’re feeling adventurous, try adding some bright berries on top after baking for a pop of color and flavor.
Preparing the Easy Breakfast Cheese Danish is not just about baking; it’s about creating a moment of joy in your kitchen. The experience of rolling out the pastry, mixing the creamy filling, and watching the pastries rise beautifully as they bake is nothing short of satisfying. Each bite of these Danishes delivers a perfect blend of flaky and creamy textures, which will undoubtedly leave you wanting more.
Once you’ve taken your first bite, you’ll be hooked, and you might find yourself planning your next baking session before you even finish the last one. If you enjoyed this recipe, you may also love our other delightful breakfast ideas, such as Fluffy Pancakes with Maple Syrup, Fruit-filled Muffins, or even our Homemade Croissants.
We’d love for you to share this recipe with family and friends, spreading the joy of baking and indulging in these delicious pastries. So go ahead, keep exploring our site for more incredible recipes, and transform your kitchen into a hub of tasty creations! Happy baking!


