Cherry Fudge
Description
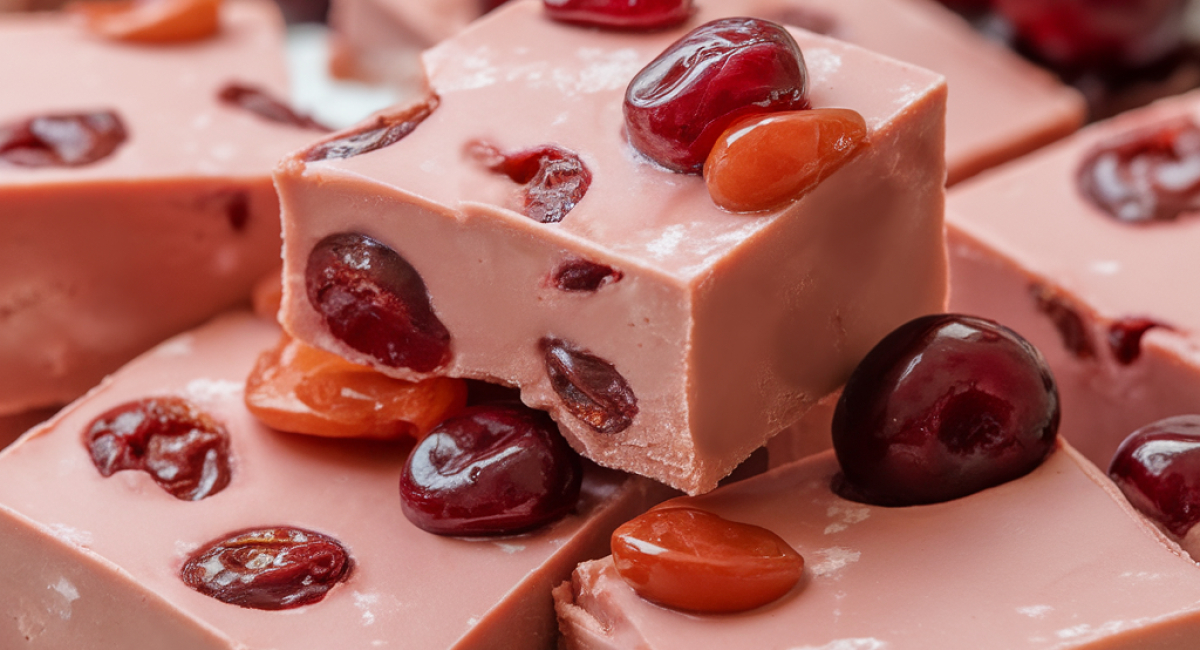
Imagine a smooth, creamy treat that melts in your mouth with each delectable bite, leaving you craving more. Meet Cherry Fudge, a sweet indulgence that marries the rich flavor of white chocolate with the vibrant tang of maraschino cherries. This delightful confection is not just a treat for the taste buds; it's a feast for the eyes, decorated with a gentle blush of pink that radiates joy and celebration.
The origin of fudge dates back to the 19th century as a simple yet irresistible candy that became popular in American households. Over the years, various flavors emerged, but cherry fudge stands out for its refreshing essence and playful character. Whether you're planning a festive gathering, a family reunion, or just want to whip up something sweet to brighten your day, this Cherry Fudge recipe is incredibly easy to make and will surely impress your friends and family.
One of the best features of this recipe is its simplicity. With just a handful of ingredients, you can create a creamy dessert that looks just as good as it tastes. The sweetened condensed milk melts beautifully with the white chocolate chips, creating a luscious base, while the maraschino cherries add delightful bites of fruitiness throughout. You’ll appreciate how quickly the fudge comes together and how effortlessly it can transform an ordinary occasion into a special celebration.
So, roll up your sleeves, gather your ingredients, and let's dive into making this delicious Cherry Fudge!
Ingredients
- For the Cherry Fudge, gather the following ingredients:
- - 3 cups white chocolate chips
- - 1 can (14 oz) sweetened condensed milk
- - 1 teaspoon vanilla extract
- - A few drops of pink or red food coloring (optional, for a vibrant color)
- - 1 cup maraschino cherries, drained and chopped
- Ingredient Substitutions and Variations:
- For those with dietary restrictions or specific preferences, don’t hesitate to make substitutions. Instead of white chocolate chips, you can use dark or milk chocolate chips for a different flavor profile. For a vegan version, seek out dairy-free white chocolate and a suitable plant-based condensed milk. If you want a fruity twist, consider adding chopped nuts or dried fruits alongside the cherries, such as walnuts or cranberries.
- If maraschino cherries aren’t your favorite, you might also try using fresh cherries—just be sure to pit them and chop them finely. The color can also be adjusted; if you love a deeper hue, feel free to add more food coloring, or skip it entirely for a classic white finish.
Preparation Method
1. Prepare your workspace.
2. Line an 8x8-inch baking pan with parchment paper.
3. In a microwave-safe bowl, combine white chocolate chips and sweetened condensed milk.
4. Microwave for 30 seconds, stir, then continue heating in 30-second intervals until smooth.
5. Stir in vanilla extract and food coloring if desired.
6. Fold in chopped maraschino cherries.
7. Pour the mixture into the prepared baking pan and smooth the top.
8. Cover and refrigerate for 2 to 3 hours until firm.
9. Lift the fudge out using the parchment paper and cut into squares.
Tips and Conclusion
For an extra touch of flair, consider drizzling a little melted chocolate over the top of the fudge before serving. Simply melt a small amount of chocolate in the microwave (similar to how you melted the white chocolate) and use a spoon or a piping bag to create an artistic drizzle. This not only enhances the visual appeal but also adds an additional layer of flavor. Also, if you want to add a hint of crunch, sprinkle some chopped nuts on top while the drizzle is still warm so they adhere nicely.
If you're storing the fudge, keep it in an airtight container in the refrigerator. It can last up to two weeks—though you might find it disappears much quicker! For longer storage, you can freeze the fudge for up to three months. Just make sure to wrap it tightly in plastic wrap and then in foil or a freezer bag to protect it from freezer burn.
Making Cherry Fudge is not just about creating a sweet treat; it’s an experience filled with creativity and joy. The process invites you into a world of rich flavors, vibrant colors, and the nostalgia of homemade candy. The result is a delightful snack perfect for sharing at parties, enjoying as a comforting sweet, or gifting to friends and loved ones.
As you indulge in this creamy fudge, take a moment to appreciate the simple pleasures it brings—the taste of sweetness, the richness of chocolate, the delightful cherry bites, and the shared smiles it creates. If you found joy in making and tasting this Cherry Fudge, why not explore other delicious recipes on our site? From classic chocolate brownies to inventive desserts, there’s a treasure trove of treats waiting for you.
We hope you share this recipe with your friends and family, inspiring them to bring a touch of sweetness into their lives too. Happy baking, and don’t forget to check out our other delightful desserts—there’s always more fun to be had in the kitchen!
