No-Bake Peanut Butter Cheesecake
Description
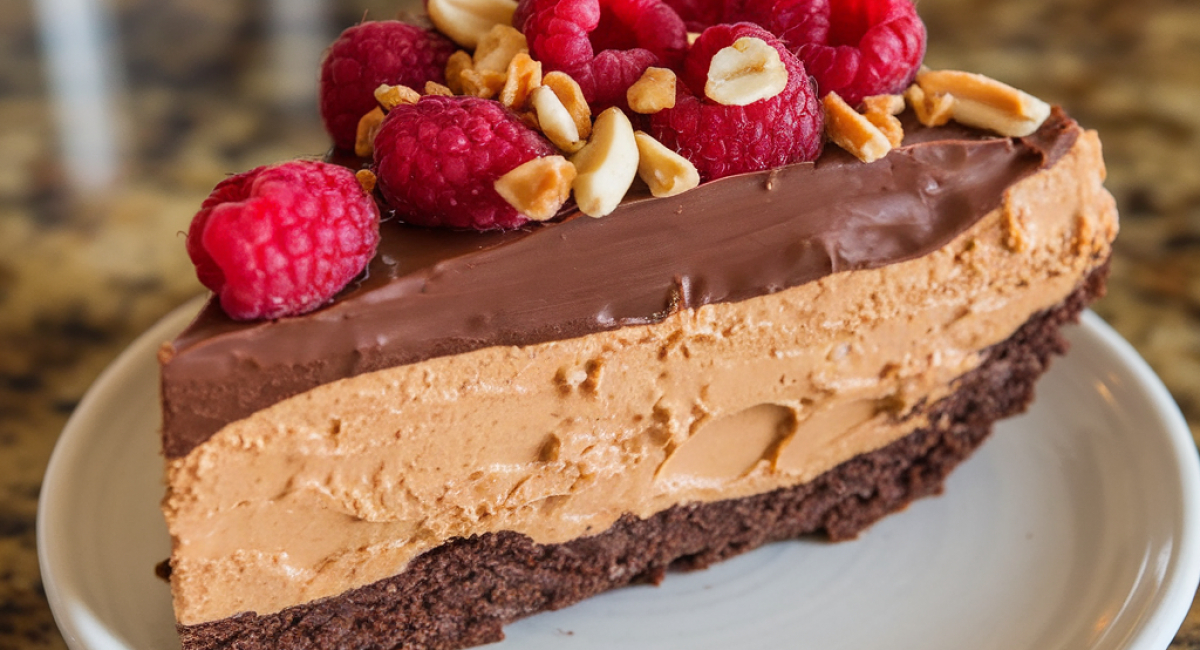
Imagine a dessert that captures the essence of creamy goodness and the thrilling taste of peanut butter, all nestled on a crunchy Oreo crust. This no-bake peanut butter cheesecake is the epitome of indulgence, combining rich flavors with a delightful texture that's perfect for any occasion. Whether you’re whipping it up for a summer gathering, a birthday celebration, or simply to treat yourself, this cheesecake is an irresistible showstopper. It’s remarkably easy to make, requiring no baking at all, making it ideal for those who prefer a simpler approach to dessert. The combination of smooth peanut butter and rich cream cheese creates a filling that is luxuriously decadent.
What sets this cheesecake apart is not just its delightful flavor but also its garnet-like topping of glossy dark chocolate ganache and the playful addition of miniature peanut butter cups, inviting you to take that first bite. Each slice is a celebration of flavor and texture—a creamy filling that melts in your mouth, a crunchy base, and a glossy finish that adds a touch of sophistication. As you prepare this dish, you may find it becomes a cherished recipe, the kind you'll go back to again and again, bringing smiles to your family and friends.
Ingredients
- For the Crust
- 24 Oreo cookies
- 5 tablespoons unsalted butter, melted
- For the Filling
- 24 ounces full-fat cream cheese, softened
- 1 cup creamy peanut butter
- 1 1/4 cups powdered sugar
- 1 teaspoon vanilla extract
- 1 1/4 cups heavy whipping cream
- For the Topping
- 4 ounces dark chocolate, chopped
- 1/2 cup heavy cream
- Miniature peanut butter cups, for garnish
- Ingredient Substitutions:
- If you're looking to mix things up or have dietary restrictions, here are some substitutions to consider. Instead of Oreo cookies, you could use graham crackers or even chocolate digestives for a different flavor profile. For a lower-fat option, you might choose reduced-fat cream cheese or a light peanut butter; however, this may impact the creaminess of your cheesecake. If you are vegan, look for plant-based cream cheese and a nut butter that suits your palate.
Preparation Method
1. Crush 24 Oreo cookies into fine crumbs using a food processor or a zip-top bag and rolling pin.
2. Combine cookie crumbs with 5 tablespoons of melted unsalted butter in a mixing bowl and stir until blended.
3. Press the mixture firmly into the bottom and sides of a 9-inch springform pan and refrigerate.
4. Beat 24 ounces of softened cream cheese in a large bowl until smooth.
5. Add 1 cup of peanut butter, 1 1/4 cups of powdered sugar, and 1 teaspoon of vanilla extract to the cream cheese and mix until combined.
6. In a separate bowl, whip 1 1/4 cups of heavy cream until stiff peaks form.
7. Gently fold the whipped cream into the peanut butter mixture until fully combined.
8. Pour the filling into the chilled Oreo crust and smooth the top, then cover and refrigerate for at least 6 hours or overnight.
9. Heat 1/2 cup of heavy cream in a saucepan until simmering, then pour it over 4 ounces of chopped dark chocolate and stir until smooth.
10. Allow the ganache to cool slightly, then pour it over the chilled cheesecake.
11. Garnish with miniature peanut butter cups and return the cheesecake to the refrigerator to set before serving.
Tips and Conclusion
For those looking to adapt this recipe for various occasions, consider adding a layer of fruit. Fresh raspberries or bananas on the top can bring a refreshing contrast to the richness of the cheesecake. If you want a more festive appearance, consider sprinkling crushed nuts or drizzling caramel sauce atop the ganache before garnishing with peanut butter cups.
As for storage, this cheesecake keeps wonderfully well! Simply cover any leftover cheesecake tightly with plastic wrap or aluminum foil and store it in the refrigerator. It should stay fresh for up to a week, although we doubt it will last that long; it’s too good to resist!
Creating this no-bake peanut butter cheesecake is not just about the destination, but the delightful journey of preparing it and sharing it with those you love. Each step invites you to indulge your senses—from crushing the cookies to melting the chocolate. As you present this masterpiece, picture the smiles of your friends and family as they take their first bite, their eyes lighting up in astonishment at this creamy slice of heaven.
If you're looking for more delectable recipes to satisfy your sweet tooth, consider exploring our chocolate mousse or vanilla panna cotta recipes for a delightful evening of dessert-making fun. Feel free to share this recipe with friends and keep browsing our website for more culinary inspirations. Happy baking, and enjoy every creamy, peanut-buttery bite of this cheesecake!

