Easiest Pineapple Cake

Description
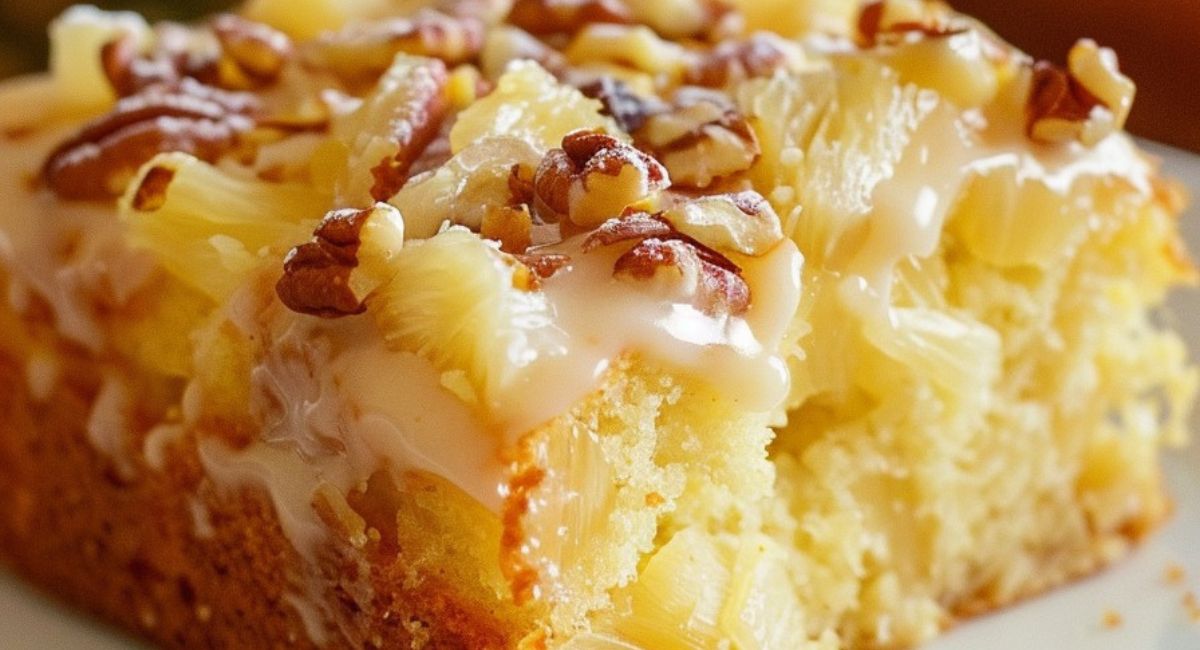
There's something uniquely delightful about baking with pineapple, a fruit that conjures up images of sunny beaches and tropical breezes. Our Easiest Pineapple Cake is not just a cake; it’s a slice of paradise that brings a burst of sunshine into any occasion. With its moist texture and that unmistakable pineapple flavor, this cake has the power to transport you to a tropical getaway with every bite.
Whether you are preparing it for a summer barbecue, a birthday celebration, or even just a cozy dinner at home, this cake is sure to impress. It’s straightforward to make, requiring just a handful of ingredients that you probably already have in your pantry. The magic lies not only in the simplicity of the preparation but also in the refreshing punch of flavor delivered by crushed pineapple in its own juice. Swathed in a luscious cream cheese frosting, this cake offers a balance of sweetness and tang that makes it all the more irresistible.
Beyond its deliciousness, this recipe carries a bit of sentimental value, often passed down through generations. It’s perfect for both novice bakers and seasoned pros looking for something quick and enjoyable. Set aside any worries about complicated techniques or ingredients; this cake is built for everyone! So, roll up your sleeves and let’s dive into this wonderful baking adventure.
Ingredients
- For the Cake:
- Two cups all-purpose flour
- Two cups granulated sugar
- One teaspoon baking soda
- One teaspoon baking powder
- One teaspoon salt
- Three large eggs
- One cup vegetable oil
- One can (20 oz) crushed pineapple in its own juice, undrained
- One cup chopped nuts (optional)
- For the Cream Cheese Frosting:
- One package (8 oz) cream cheese, softened
- One-third cup unsalted butter, softened
- One teaspoon vanilla extract
- Four cups powdered sugar
- Two tablespoons milk (optional for consistency)
Preparation Method
1. Preheat the oven to 350 degrees Fahrenheit.
2. In a large bowl, mix flour, sugar, baking soda, baking powder, and salt until well blended.
3. In another bowl, beat three eggs and add one cup of vegetable oil, mixing until smooth.
4. Add crushed pineapple with juice to the egg and oil mixture and mix well.
5. Combine the wet and dry ingredients gently until just mixed, leaving some flour streaks.
6. If desired, fold in chopped nuts.
7. Grease a 9x13 inch baking pan and pour in the batter, spreading it evenly.
8. Bake for 35 to 40 minutes, checking with a toothpick for doneness.
9. While the cake bakes, prepare the frosting by mixing room temperature cream cheese and butter until creamy.
10. Gradually add powdered sugar, mixing on low speed, and adjust with milk if needed.
11. Allow the cake to cool in the pan for 10 to 15 minutes before transferring to a wire rack to cool completely.
12. Once cool, spread the cream cheese frosting on top and add nuts if desired.
Tips and Conclusion
If you have any leftover cake (though I doubt you will, it’s that good!), here’s a nifty storage tip: wrap slices tightly in plastic wrap or store them in an airtight container. This will help maintain the cake's moisture. The Easiest Pineapple Cake can stay fresh for about 3 days at room temperature, or up to a week in the refrigerator. If you want to make it ahead of time, consider assembling the cake and frosting it just before serving for the best texture and flavor.
Additionally, think about dressing the cake up for special occasions! You can add a layer of fresh fruit like sliced strawberries or blueberries atop your frosting or even incorporate coconut flakes for a tropical twist. Feeling adventurous? Experiment with flavored cream cheese frosting—maybe a hint of lemon or lime could offer a zesty contrast to the sweetness!
As you take your first sip or bite, the Easiest Pineapple Cake embodies everything wonderful about baking: simplicity, flavor, and joy. It’s more than just a dessert; it’s a delightful experience that brings people together around the kitchen table, mixing memories and flavors that last a lifetime.
From its soft, moist layers to the sweet cream cheese frosting, every slice delivers a taste of happiness that’s hard to replicate. Every time you prepare this cake, it’s not just a baking session; it’s an opportunity to create cherished moments with family and friends. So why not share your experience? Invite your loved ones for a slice, or even better, share this recipe with someone who needs a little sunshine in their kitchen.
Don’t forget to browse our other delicious recipes! From classic desserts to savory delights, there’s a treasure trove of culinary adventures waiting for you. Each recipe invites you to embrace the joy of baking and cooking, so keep exploring! Happy baking!


