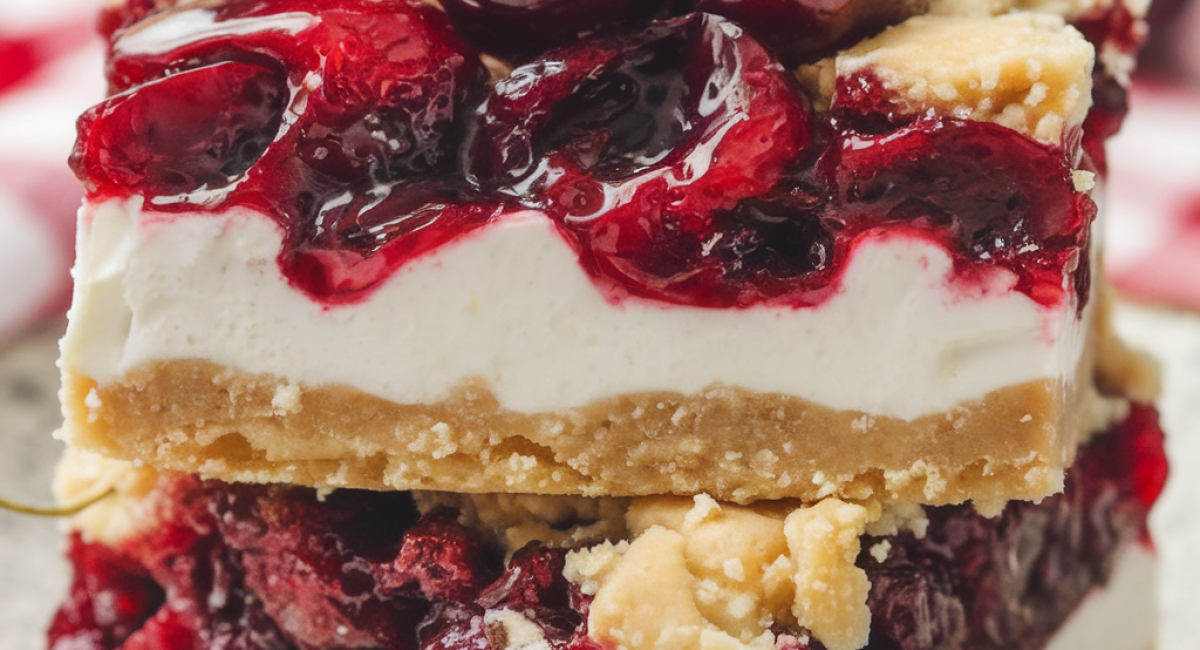
Cherry Pie Bars
Description
Welcome to a delightful culinary adventure with cherry pie bars, a treat that effortlessly combines the classic comforts of cherry pie with the convenience of bar cookies. Picture a golden, buttery crust enveloping a luscious cherry filling, baked to perfection and topped with a creamy glaze that adds just the right amount of sweetness. This dessert is not just a feast for your taste buds; it also captures the essence of nostalgia, reminiscent of warm summer days when cherry trees are heavy with fruit and kitchens overflow with the intoxicating scent of baking.
Cherry pie bars are surprisingly simple to make, yet they deliver an impressive outcome that will have your friends and family raving. Whether it’s for a summer picnic, a cozy afternoon tea, or a festive gathering, these bars are a versatile addition to your dessert repertoire. Plus, they are perfect for those who adore cherries! By choosing your homestyle pie-inspired treat, you're inviting the joy of baking into your home, creating memories with every delicious bite.
So, roll up your sleeves, gather your ingredients, and let’s dive into this enchanting recipe that will soon become a favorite in your household. With a few simple steps, you'll unlock the sweet, tart, and buttery goodness that is sure to elevate any occasion.
Ingredients
- *For the dough:*
- 1 cup unsalted butter, softened to room temperature
- 1 ½ cups granulated sugar
- 1 teaspoon pure vanilla extract
- 4 large eggs
- 3 cups all-purpose flour
- 1 teaspoon baking powder
- ½ teaspoon salt
- *For the filling:*
- 1 can (approximately 600g) cherry pie filling (you can also use fresh cherries cooked with sugar and cornstarch for a homemade twist)
- *Optional glaze for topping:*
- 1 cup powdered sugar
- 2 to 3 tablespoons milk
- ½ teaspoon almond extract (or vanilla extract)
- Feel free to experiment with your filling; for instance, if cherries are not in season, diced peaches or blueberries can lend a delightful twist to the bars.
Preparation Method
1. Preheat the oven to 350°F or 180°C.
2. Grease a 13x9 inch baking pan with butter or non-stick spray and dust with flour.
3. In a large bowl, beat softened butter and granulated sugar until light and fluffy, about 3 to 5 minutes.
4. Add vanilla extract and eggs one at a time, mixing well after each addition.
5. In a separate bowl, whisk together flour, baking powder, and salt.
6. Gradually add the dry ingredients to the wet mixture, stirring gently until just combined.
7. Reserve one-third of the dough and spread the remaining two-thirds evenly in the bottom of the prepared pan.
8. Pour cherry pie filling over the crust evenly.
9. Break the reserved dough into chunks and scatter over the cherry filling.
10. Bake for 30 to 35 minutes until golden and firm; check with a toothpick for doneness.
11. Remove from the oven and let cool completely in the pan.
12. Prepare the optional glaze by mixing powdered sugar, milk, and almond or vanilla extract until smooth.
13. Drizzle the glaze over the cooled bars.
14. Let the glaze set for a few minutes before slicing into squares or rectangles.
15. Serve and enjoy.
Tips and Conclusion
For optimal storage, keep your cherry pie bars in an airtight container at room temperature for about three days. They also freeze beautifully! Simply wrap the individual bars in plastic wrap followed by aluminum foil, and they can last in the freezer for up to three months. When you are ready to enjoy them, just thaw at room temperature or warm them slightly in the microwave.
If you’re seeking a refreshing complement to these bars, consider pairing them with a scoop of vanilla ice cream or a dollop of whipped cream. A sprinkle of chopped nuts or a handful of fresh berries can add a beautiful garnish and a pop of additional flavor.
There you have it—a luscious, sweet, and slightly tart cherry pie bar perfect for any occasion! The beauty of this recipe lies not only in its delightful flavor but also in its ability to bring people together, evoking shared memories and joyful gatherings.
After indulging in your homemade cherry pie bars, why not explore more of our sweet offerings? From cakes and cookies to innovative dessert ideas, you'll find something to satisfy every craving. Baking these cherry pie bars is just the beginning of your delicious journey in the kitchen—share this recipe with friends and encourage them to try their hand at these irresistible treats! Now, go on and keep browsing for more delightful recipes that are waiting to inspire you. Happy baking!