Blender Cinnamon Roll Cheesecake Bars
Description
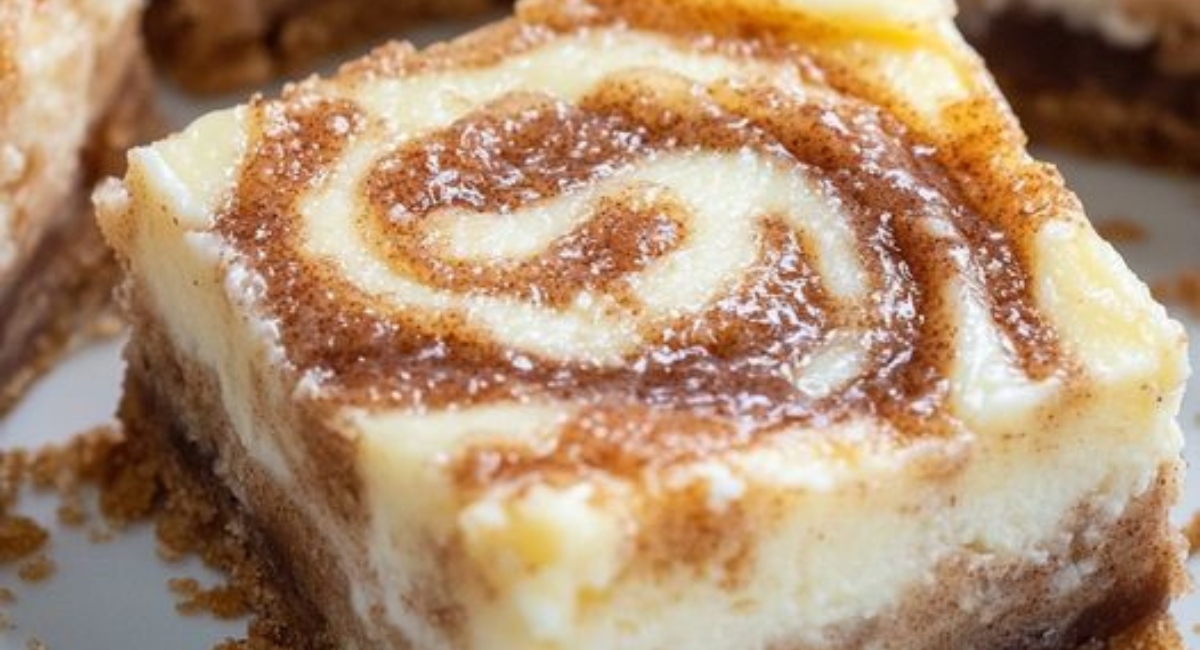
Indulging in a dessert that combines the rich, creamy decadence of cheesecake with the warm, comforting flavors of cinnamon rolls is an experience that transcends the ordinary. The Blender Cinnamon Roll Cheesecake Bars are a delightful fusion of textures and flavors, perfect for those who crave something sweet but also want the wow factor. Imagine soft, velvety cheesecake enveloped in a swirling cinnamon filling—each bite brings forth a symphony of creamy sweetness enhanced by a hint of spiced warmth.
This delightful dessert has origins in the classic American cheesecake paired with beloved cinnamon rolls. While both of these confections are enjoyed separately, bringing them together elevates the taste to a realm of exquisite indulgence. The ease of preparation, with most of the work being done in a blender, makes this recipe not only accessible for seasoned bakers but also for novices eager to impress their friends and family. Each bar is a slice of bliss, suited for casual gatherings, special occasions, or simply to satisfy your sweet tooth.
As you embark on this culinary adventure, you'll discover how simple ingredients come together to create a masterpiece that will leave everyone asking for seconds—and maybe even the recipe! This enticing recipe will not only enhance your baking repertoire but will also serve as a warm reminder that delightful treats can be created with love and passion.
Ingredients
- For the Crust:
- 1. 1 1/2 cups graham cracker crumbs
- 2. 1/4 cup light brown sugar
- 3. 6 tablespoons melted butter
- 4. 1/2 teaspoon salt
- For the Filling:
- 1. 16 oz softened cream cheese
- 2. 3/4 cup granulated sugar
- 3. 2 large eggs, at room temperature
- 4. 1/2 cup sour cream, at room temperature
- 5. 2 teaspoons vanilla extract
- For the Cinnamon Swirl:
- 1. 6 tablespoons melted butter
- 2. 1 cup dark brown sugar
- 3. 1 teaspoon ground cinnamon
- 4. 1/4 cup all-purpose flour
Preparation Method
1. Preheat the oven to 350°F or 177°C.
2. In a bowl, mix melted butter, graham cracker crumbs, brown sugar, and salt until sandy and sticks together.
3. Press the mixture into an 8-inch square baking dish and bake for 8 minutes. Set aside to cool.
4. Lower the oven temperature to 325°F or 163°C.
5. In a blender, combine cream cheese, sugar, and vanilla. Blend until smooth.
6. Add sour cream and blend until combined.
7. Add eggs one at a time, blending after each addition until smooth.
8. In a separate bowl, mix melted butter, brown sugar, cinnamon, and flour until spreadable.
9. Pour half of the cheesecake filling over the cooled crust.
10. Dollop cinnamon mixture on top and swirl with a knife.
11. Pour remaining cheesecake filling over and repeat the dolloping and swirling.
12. Bake for 35-40 minutes until edges are set and center jiggles.
13. Let cool to room temperature, then refrigerate for at least 2 hours.
14. Slice into bars and serve cold or at room temperature.
Tips and Conclusion
These Cinnamon Roll Cheesecake Bars are versatile in their own right. You can add a personal twist by incorporating chopped nuts like pecans or walnuts into the cinnamon swirl for added texture. If you're looking to change it up even further, consider using a different type of cookie for the crust—chocolate sandwich cookies can give a delightful twist.
Additionally, if you're looking to prepare these bars ahead of time, they can be stored in an airtight container in the refrigerator for up to a week—if they last that long! They can also be frozen for future enjoyment; just be sure to wrap each bar in plastic wrap before placing them in an airtight container. When you’re ready to enjoy, simply let them thaw in the refrigerator overnight.
Preparing these Blender Cinnamon Roll Cheesecake Bars is more than just a baking task; it's an opportunity to create a moment of joy that you can share with your loved ones. The creamy texture of the cheesecake, combined with the fragrant swirl of cinnamon, evokes warmth and comfort. The first bite transports you to a world where flavors and memories intertwine, where dessert is not just food, but an experience to savor.
With this recipe under your belt, you’ll have a go-to treat for gatherings or even a cozy night in. Don't forget to explore the other delightful recipes on our site that can accompany these bars, like a refreshing fruit tart or a rich chocolate cake. There's a wealth of inspiration waiting for you to discover!
So gather your ingredients, fire up the blender, and dive into the delightful process of creating these bars. Share them with friends, bring them to gatherings, or enjoy a slice with your favorite warm beverage as you take a moment for yourself. Happy baking, and remember, sweet treats are best when shared!


