Cookie Monster cheesecake!
Description
When we think of indulgent desserts, few can compare to the rich allure of a cheesecake. Now, imagine combining that creamy, luscious experience with a playful twist inspired by everyone's favorite blue monster from the beloved children’s television series. Enter the Cookie Monster Cheesecake! This whimsical dessert captures the playful spirit of its inspiration and brings joy to both children and adults alike. Its decadent layers of creamy cheesecake, velvety chocolate, and sweet cookie crumbles evoke a delightful nostalgia that reminds us of carefree childhood days.
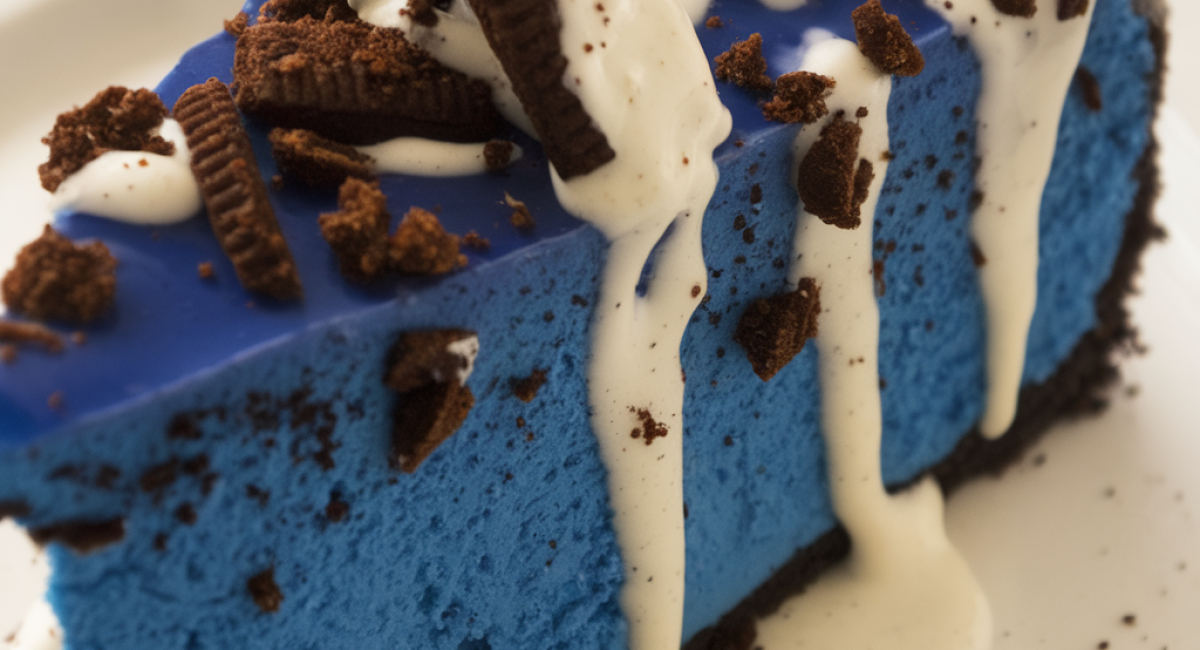
This delightful cheesecake features a dark chocolate cookie crust that provides a contrasting crunch to the silky filling. The filling itself is a harmonious blend of cream cheese, sugar, sour cream, and hefty dollops of mini chocolate chips, baked until just set, and decorated with vibrant blue frosting and cookie "crumbles." Whether you're celebrating a birthday, hosting a casual get-together, or simply treating yourself to something sweet, this Cookie Monster Cheesecake will undoubtedly become the star of the dessert table.
Best of all, this recipe is surprisingly easy to follow, even for beginner bakers! It invites you to experiment and customize, making it an accessible and fun project for anyone in the kitchen. So, gather your ingredients and let’s dive into this delicious adventure!
Ingredients
- For the Crust:
- 1 ½ cups crushed chocolate sandwich cookies (such as Oreos)
- ¼ cup granulated sugar
- ½ cup unsalted butter, melted
- For the Cheesecake Filling:
- 4 packages (8 oz each) cream cheese, softened to room temperature
- 1 cup granulated sugar
- 1 cup sour cream
- 1 cup heavy cream
- 4 large eggs
- 1 teaspoon vanilla extract
- ½ cup all-purpose flour
- 1 cup mini chocolate chips
- For the Cookie Monster Crumbles:
- 1 cup blue-colored chocolate chip cookies (store-bought or homemade)
- ¼ cup mini chocolate chips
- For the Cookie Monster Decoration:
- Blue frosting (store-bought or homemade)
- Mini chocolate chips or candy eyes for decoration
Preparation Method
1. Preheat oven to 325°F and prepare a 9-inch springform pan with parchment paper and grease the sides.
2. Mix crushed chocolate sandwich cookies and granulated sugar in a bowl, then add melted butter and stir until combined.
3. Press the mixture into the bottom of the pan and bake for 10 minutes. Let cool.
4. Beat softened cream cheese in a large bowl until creamy, then add granulated sugar and mix.
5. Add sour cream and heavy cream, blending until smooth.
6. Add eggs one at a time, mixing well after each addition. Then mix in vanilla extract and flour until just combined.
7. Fold in mini chocolate chips and pour the filling over the cooled crust.
8. Bake for 60-70 minutes until edges are golden and center jiggles slightly.
9. Turn off the oven and let the cheesecake cool inside for one hour with the door ajar. Then cool at room temperature before refrigerating for at least four hours.
10. Crush blue chocolate chip cookies and mix with additional mini chocolate chips for the cookie crumbles.
11. Spread blue frosting over the chilled cheesecake.
12. Sprinkle cookie crumbles on top and add mini chocolate chips or candy eyes for decoration.
Tips and Conclusion
If you want to make this cheesecake even more special, consider drizzling some melted chocolate over the top before adding the frosting for an extra touch of indulgence. Alternatively, for a more vibrant look, you could swirl some colored frosting to create a marbled effect. To store, cover your cheesecake with plastic wrap or an airtight container in the refrigerator, where it will remain fresh for up to five days—if it lasts that long!
Creating this Cookie Monster Cheesecake is not just about baking; it's about experiencing the joy and excitement of a delightful dessert. Every layer, every bite, bursts with flavor and nostalgia. You’ll find that it’s not just a treat for the taste buds, but a feast for the eyes as well, making it perfect for any occasion.
We hope you enjoy making this whimsical cheesecake as much as we do. Remember, sharing is caring—invite friends and family to indulge in this delightful creation with you! And if you loved this recipe, why not explore some of our other sweet offerings? From classic chocolate cakes to inventive cookie recipes, there's something to satisfy every sweet tooth. Join our community, and happy baking!

