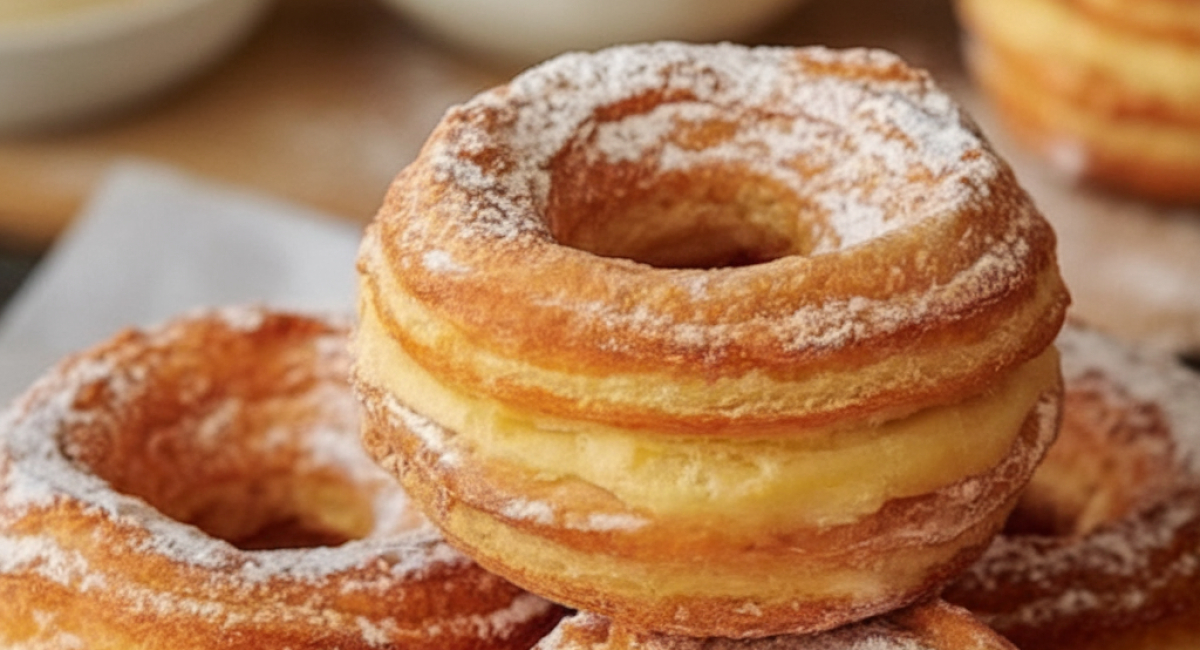
Homemade Cronuts
Description
What do you get when you marry the flaky textures of a croissant with the delightful roundness of a doughnut? You get the magical creation known as the cronut! Originating from New York City in 2013, this pastry sensation took the culinary world by storm and quickly became a viral phenomenon. Picture a beautifully golden, airy, and layered treat that’s crisp on the outside and soft on the inside, waiting to be filled with your favorite creamy goodness.
The allure of cronuts lies not just in their unique duality but also in their endless customization options. Whether you prefer them stuffed with luscious pastry cream, whipped cream, or even a delightful fruit jam, these pastries promise an explosion of flavors in every bite. Making cronuts at home may seem daunting at first, but fear not! With detailed guidance and love infused into your baking, you are just a few simple steps away from creating an irresistible batch of your own.
Whether you’re planning to impress guests at a brunch, indulge yourself on a lazy weekend morning, or relive nostalgic moments from the past by experimenting with flavors reminiscent of a favorite local café, this recipe will guide you to cronut perfection. So, roll up your sleeves and get ready to embrace the delicious adventure of making these gourmet treats right in your own kitchen!
Ingredients
- For the Dough:
- - 2 cups all-purpose flour
- - 1/4 cup sugar
- - 1 teaspoon salt
- - 1/2 cup unsalted butter, cold and cubed
- - 1/2 cup milk, warmed to about 110°F (43°C)
- - 1 packet active dry yeast (approximately 2 1/4 teaspoons)
- - 1 large egg
- - 1 teaspoon vanilla extract
- For Frying:
- - 2 cups vegetable oil (for deep frying)
- For Coating:
- - 1/2 cup sugar (granulated)
- For the Filling:
- - 1 cup pastry cream or whipped cream (feel free to choose your favorite flavor)
- - 1 tablespoon vanilla extract
- Ingredient Substitutions and Variations:
- - If you don't have all-purpose flour, cake flour can be used, but it will change the texture slightly.
- - Use coconut oil or canola oil as a substitute for vegetable oil—each brings a unique flavor to the frying process.
- - For an exciting twist, consider adding flavored extracts (like almond or lemon) to either the dough or the filling.
- - You can also substitute the pastry cream with fruit-flavored fillings such as raspberry or blueberry pureé for a fresh and zesty cronut experience.
Preparation Method
1. Activate the yeast by combining warm milk and active dry yeast in a small bowl. Let it sit for 5 to 10 minutes until bubbly.
2. In a large bowl, mix all-purpose flour, sugar, and salt. Add cold, cubed butter and mix until it resembles coarse crumbs.
3. Combine the yeast mixture with the flour mixture, then add an egg and vanilla extract. Stir until a soft dough forms.
4. Knead the dough on a floured surface for 5 to 7 minutes until smooth and elastic.
5. Wrap the dough in plastic wrap and refrigerate for at least 1 hour.
6. Roll the chilled dough into a rectangle about 1/2 inch thick. Fold it like a letter and repeat the rolling and folding process three times.
7. Roll the dough out one last time and cut out cronut shapes with a round cutter. Cut out the centers for a doughnut shape if desired.
8. Arrange the cut cronuts on a lined baking sheet, cover with a cloth, and let them rise for 30 minutes at room temperature.
9. Heat vegetable oil in a pot to 350°F (175°C). Fry the cronuts in small batches for 2 to 3 minutes on each side until golden brown.
10. Transfer the fried cronuts to paper towels to absorb excess oil and roll them in granulated sugar while warm.
11. Prepare a piping bag with pastry cream or whipped cream. Fill each cronut through a small hole in the bottom or side.
12. Serve the fresh cronuts and enjoy!
Tips and Conclusion
If you want to take your cronuts to the next level, consider creating a glaze! A simple icing made from powdered sugar and milk can elevate your flavors even more. Just mix 1 cup of powdered sugar with about 2 tablespoons of milk until smooth, then dip or drizzle your fried cronuts for an even sweeter treat. Alternatively, add vibrant food coloring to correspond with seasonal themes such as Valentine’s Day or Halloween.
After making cronuts, if you have leftovers (which might be unlikely given how delicious they are!), store them in an airtight container at room temperature for up to two days. To refresh their flaky texture, consider warming them slightly in an oven before serving.
Creating homemade cronuts is an exciting culinary adventure that merges baking with a bit of frying flair, resulting in an indulgent experience sure to impress. As you savor each bite of this crispy, creamy delight, you’ll appreciate the effort put into crafting them. Cooking can be a beautiful and rewarding journey, filled with flavors, techniques, and memories; with this recipe, you're on the path to creating something special!
As you explore other pages on our site, consider trying your hand at further delightful pastries like classic éclairs or fluffy brioche doughnuts that promise to keep your kitchen bustling. Share this recipe with friends and family or bookmark it for your next baking session. Let the world know about your homemade cronut creation — it’s time for everyone to experience this delightful combination of pastries! Happy baking!